
Table of Contents
Demo Video
Here is a quick video to show how to use the Brieftons PerfectCut Food Chopper.
Overview
The Brieftons PerfectCut Food Chopper takes the hard work out of chopping vegetables and fruits. It helps you to quickly make consistent, uniform dice, sticks/chips, and wedges, from a wide variety of vegetables & fruits. It comes with 4 stainless steel blades for chopping and dicing your way to a professionally prepared meal.
Components
Here are the components of your chopper:
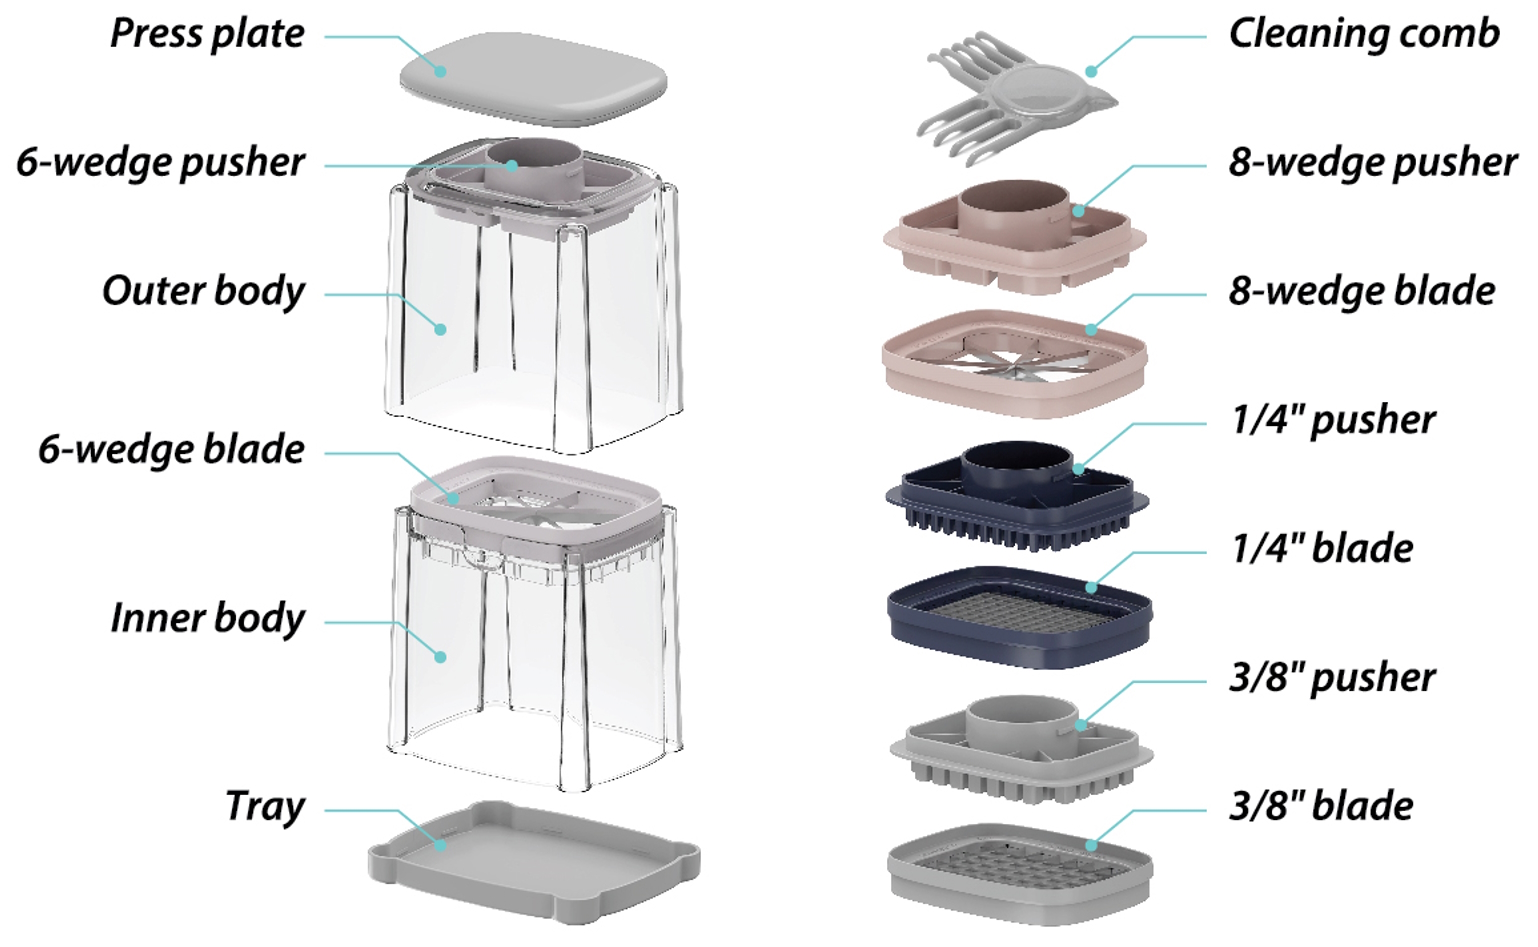
- Press plate
- Outer body
- Inner body
- Tray
- Cleaning comb
- 4 stainless steel blades (1/4″ blade, 3/8″ blade, 6-wedge blade, 8-wedge blade) and 4 corresponding pushers. They are color coded such that each pair of blade and pusher have the same matching color.
How to Use
Using the chopper is so simple!
- Insert the inner body onto the tray.
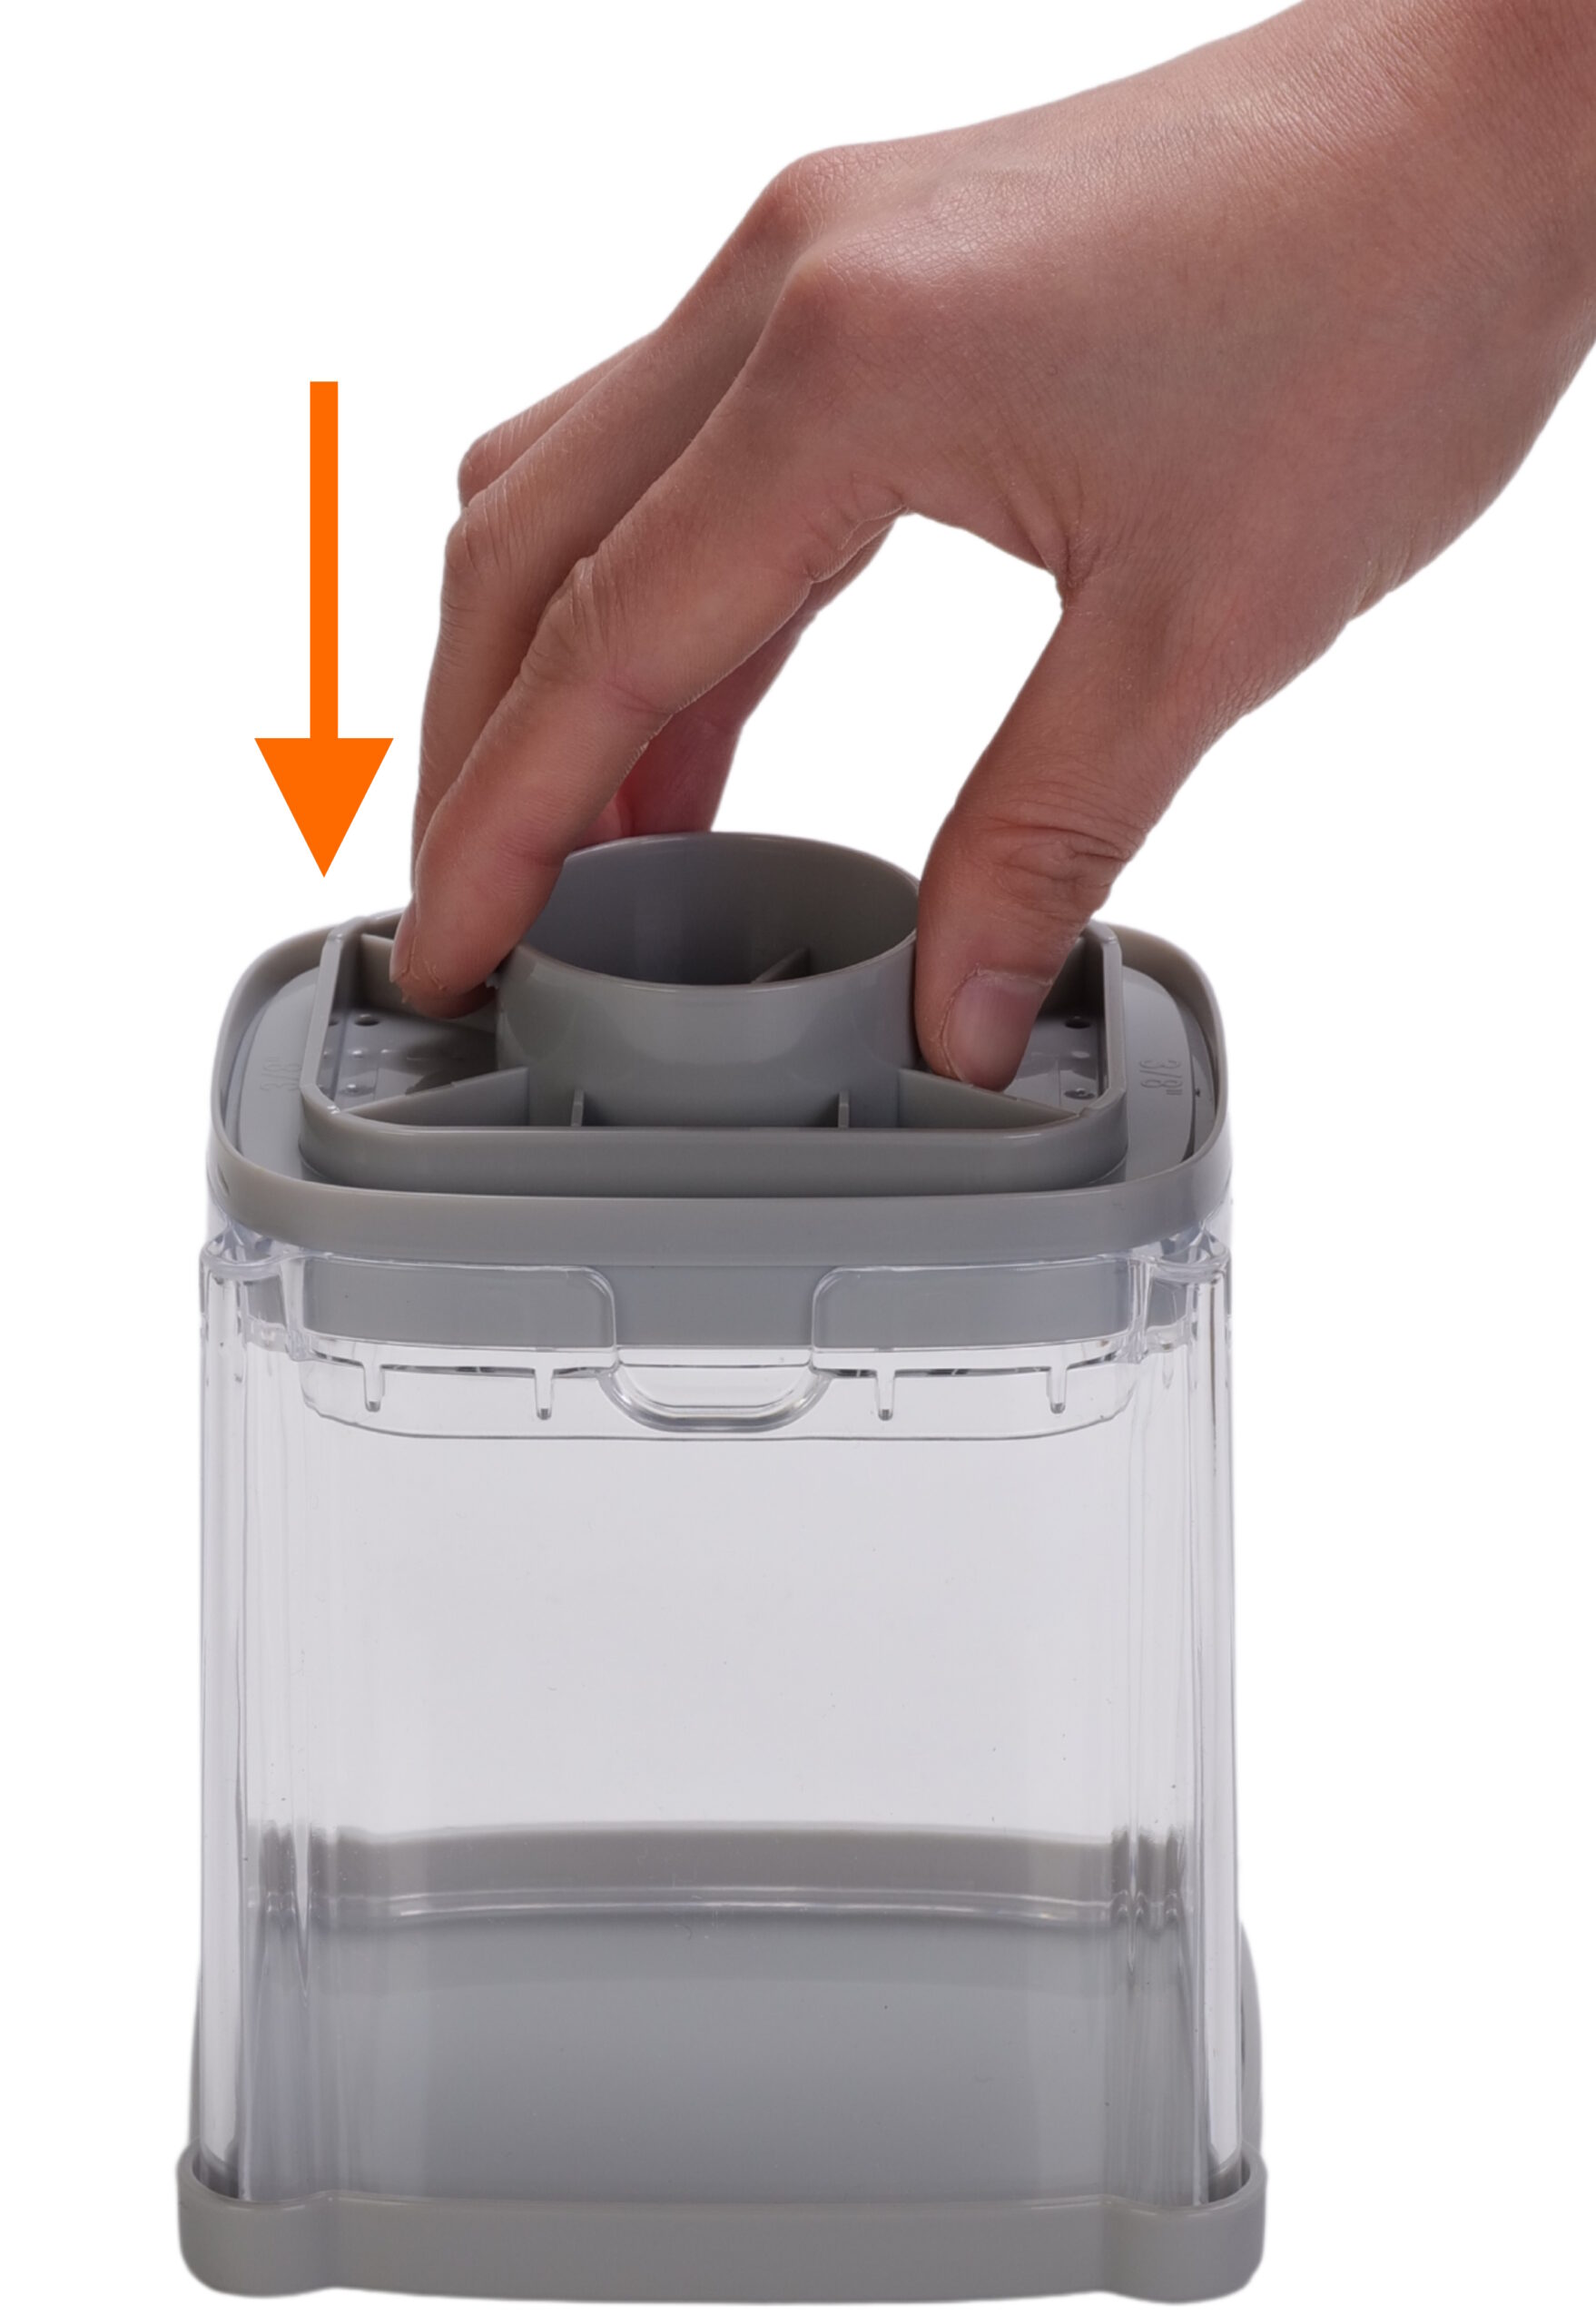
- Insert the desired blade into the top of the inner body, so that it sits flush. Make sure the side marked with “THIS SIDE UP” faces upwards.
- Insert the corresponding pusher onto the blade insert. Ensure the pusher has the same color as the installed blade.
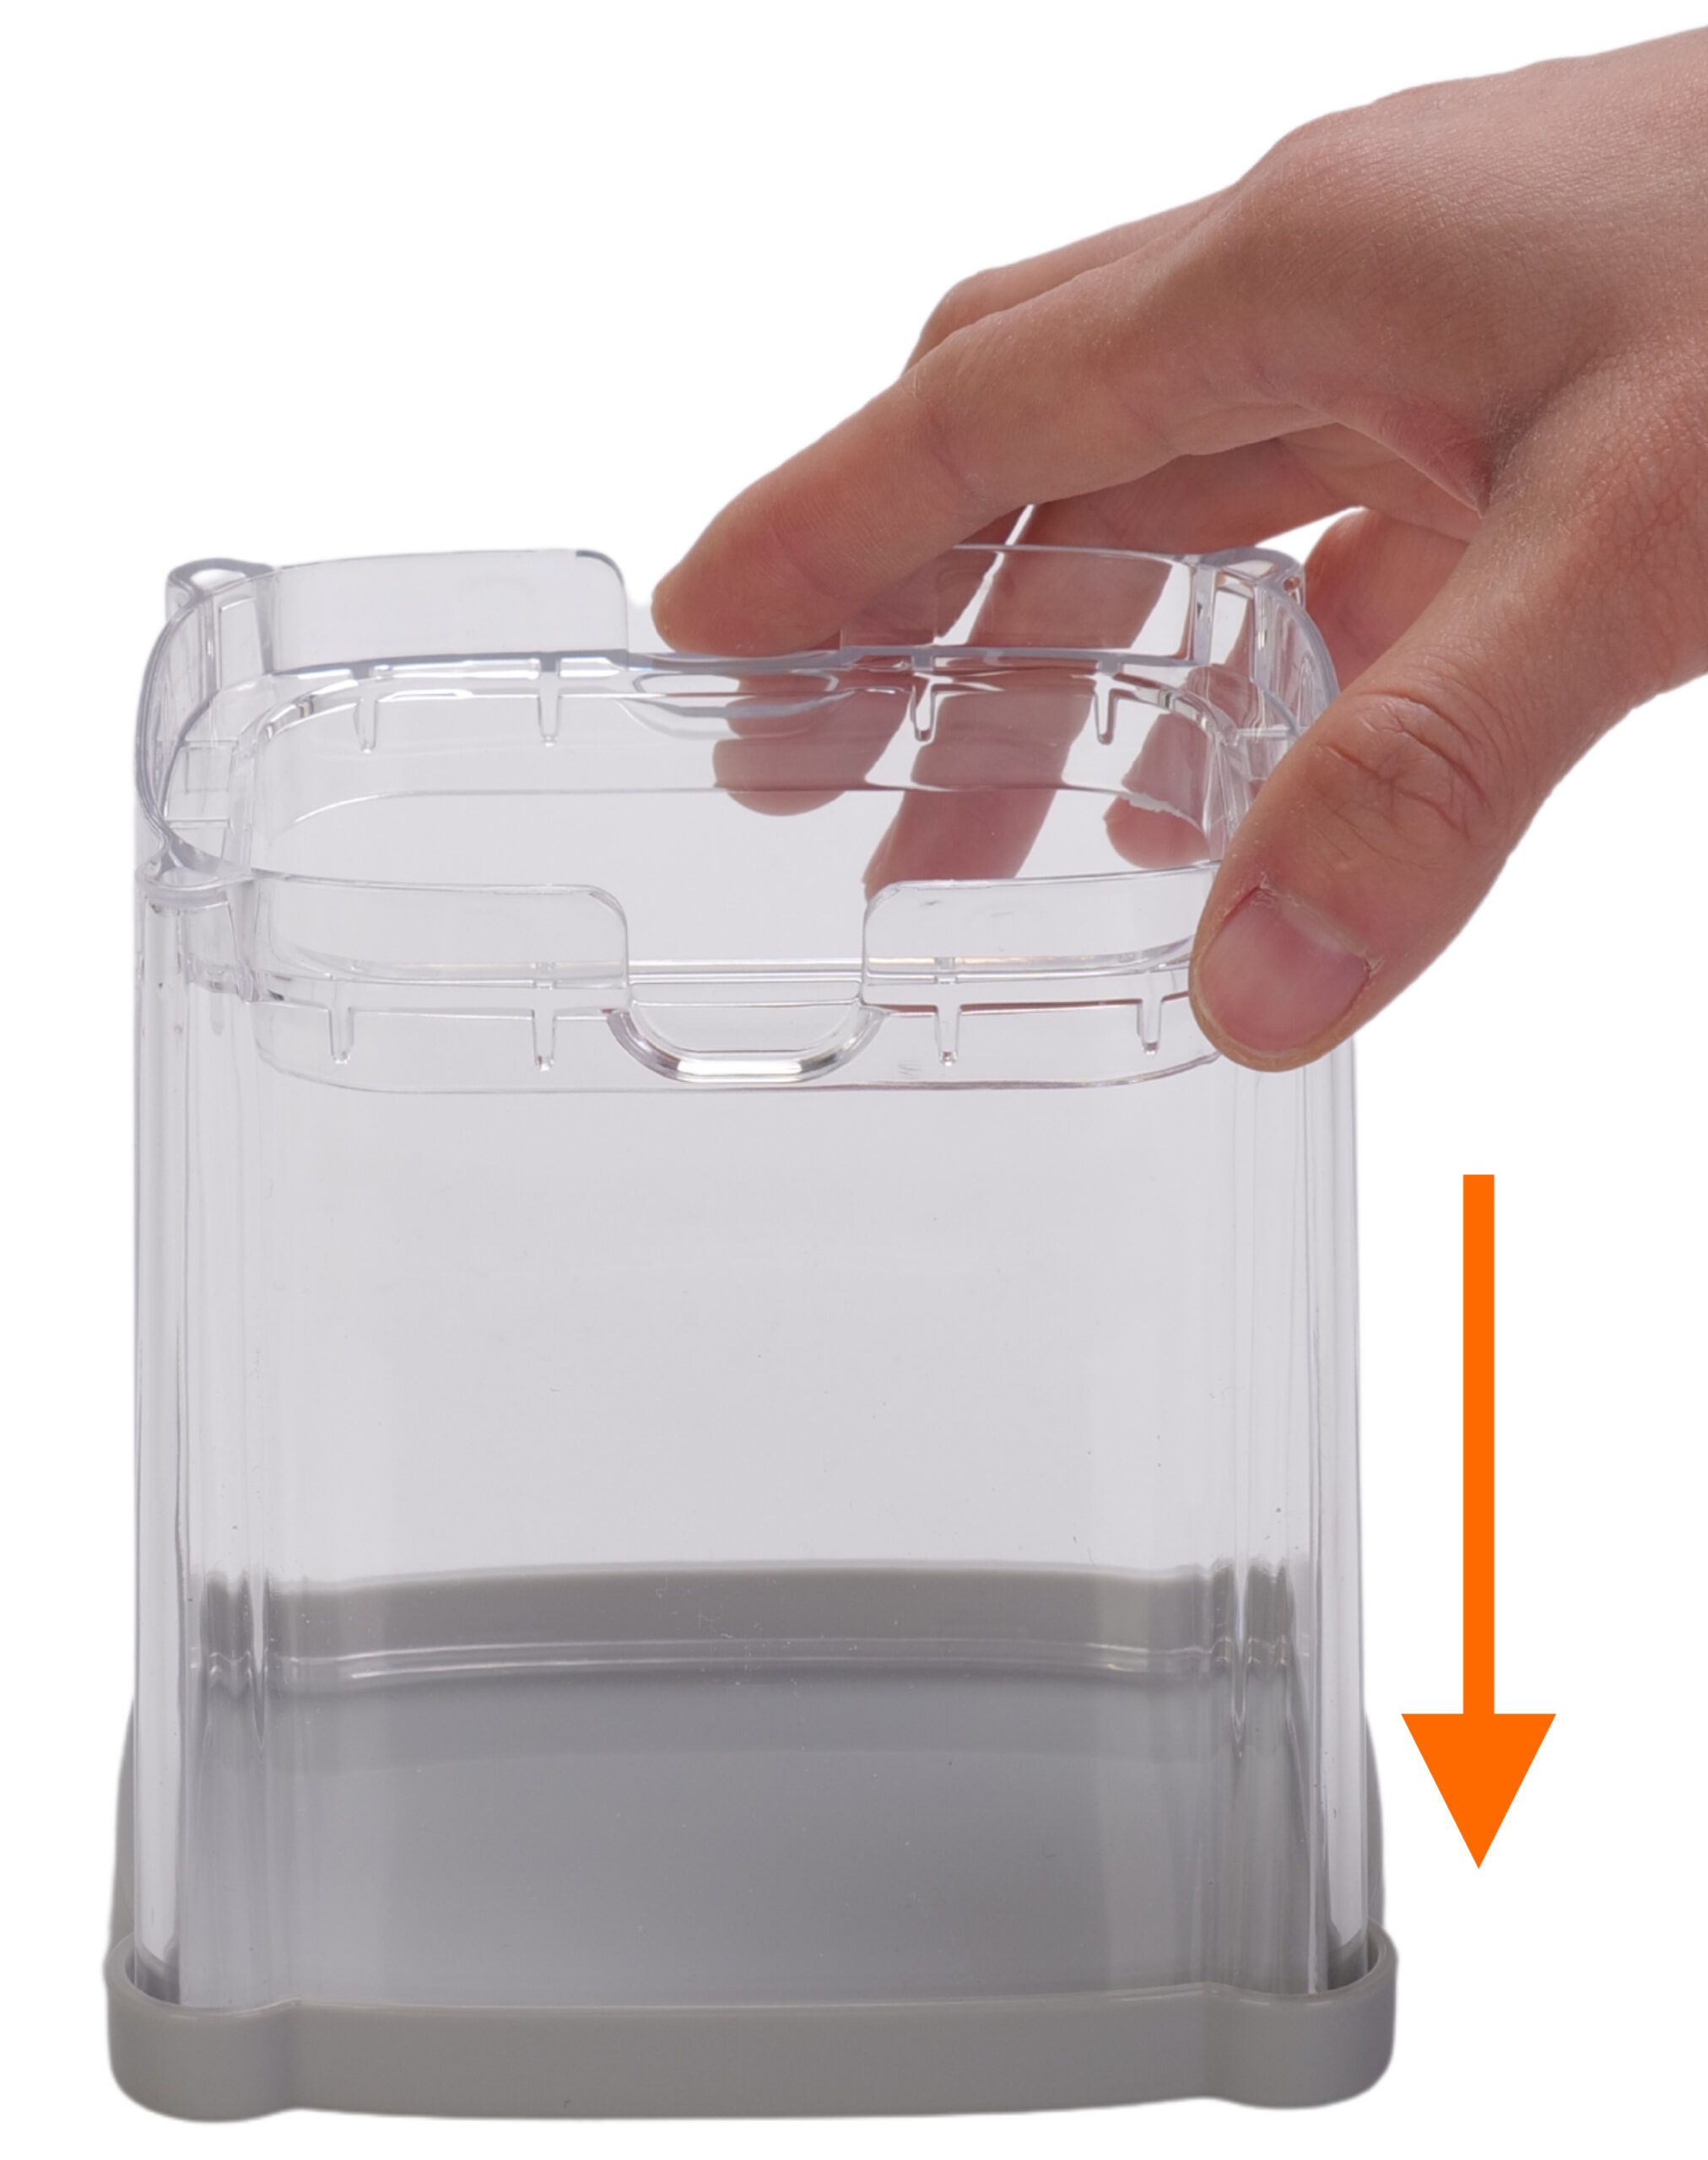
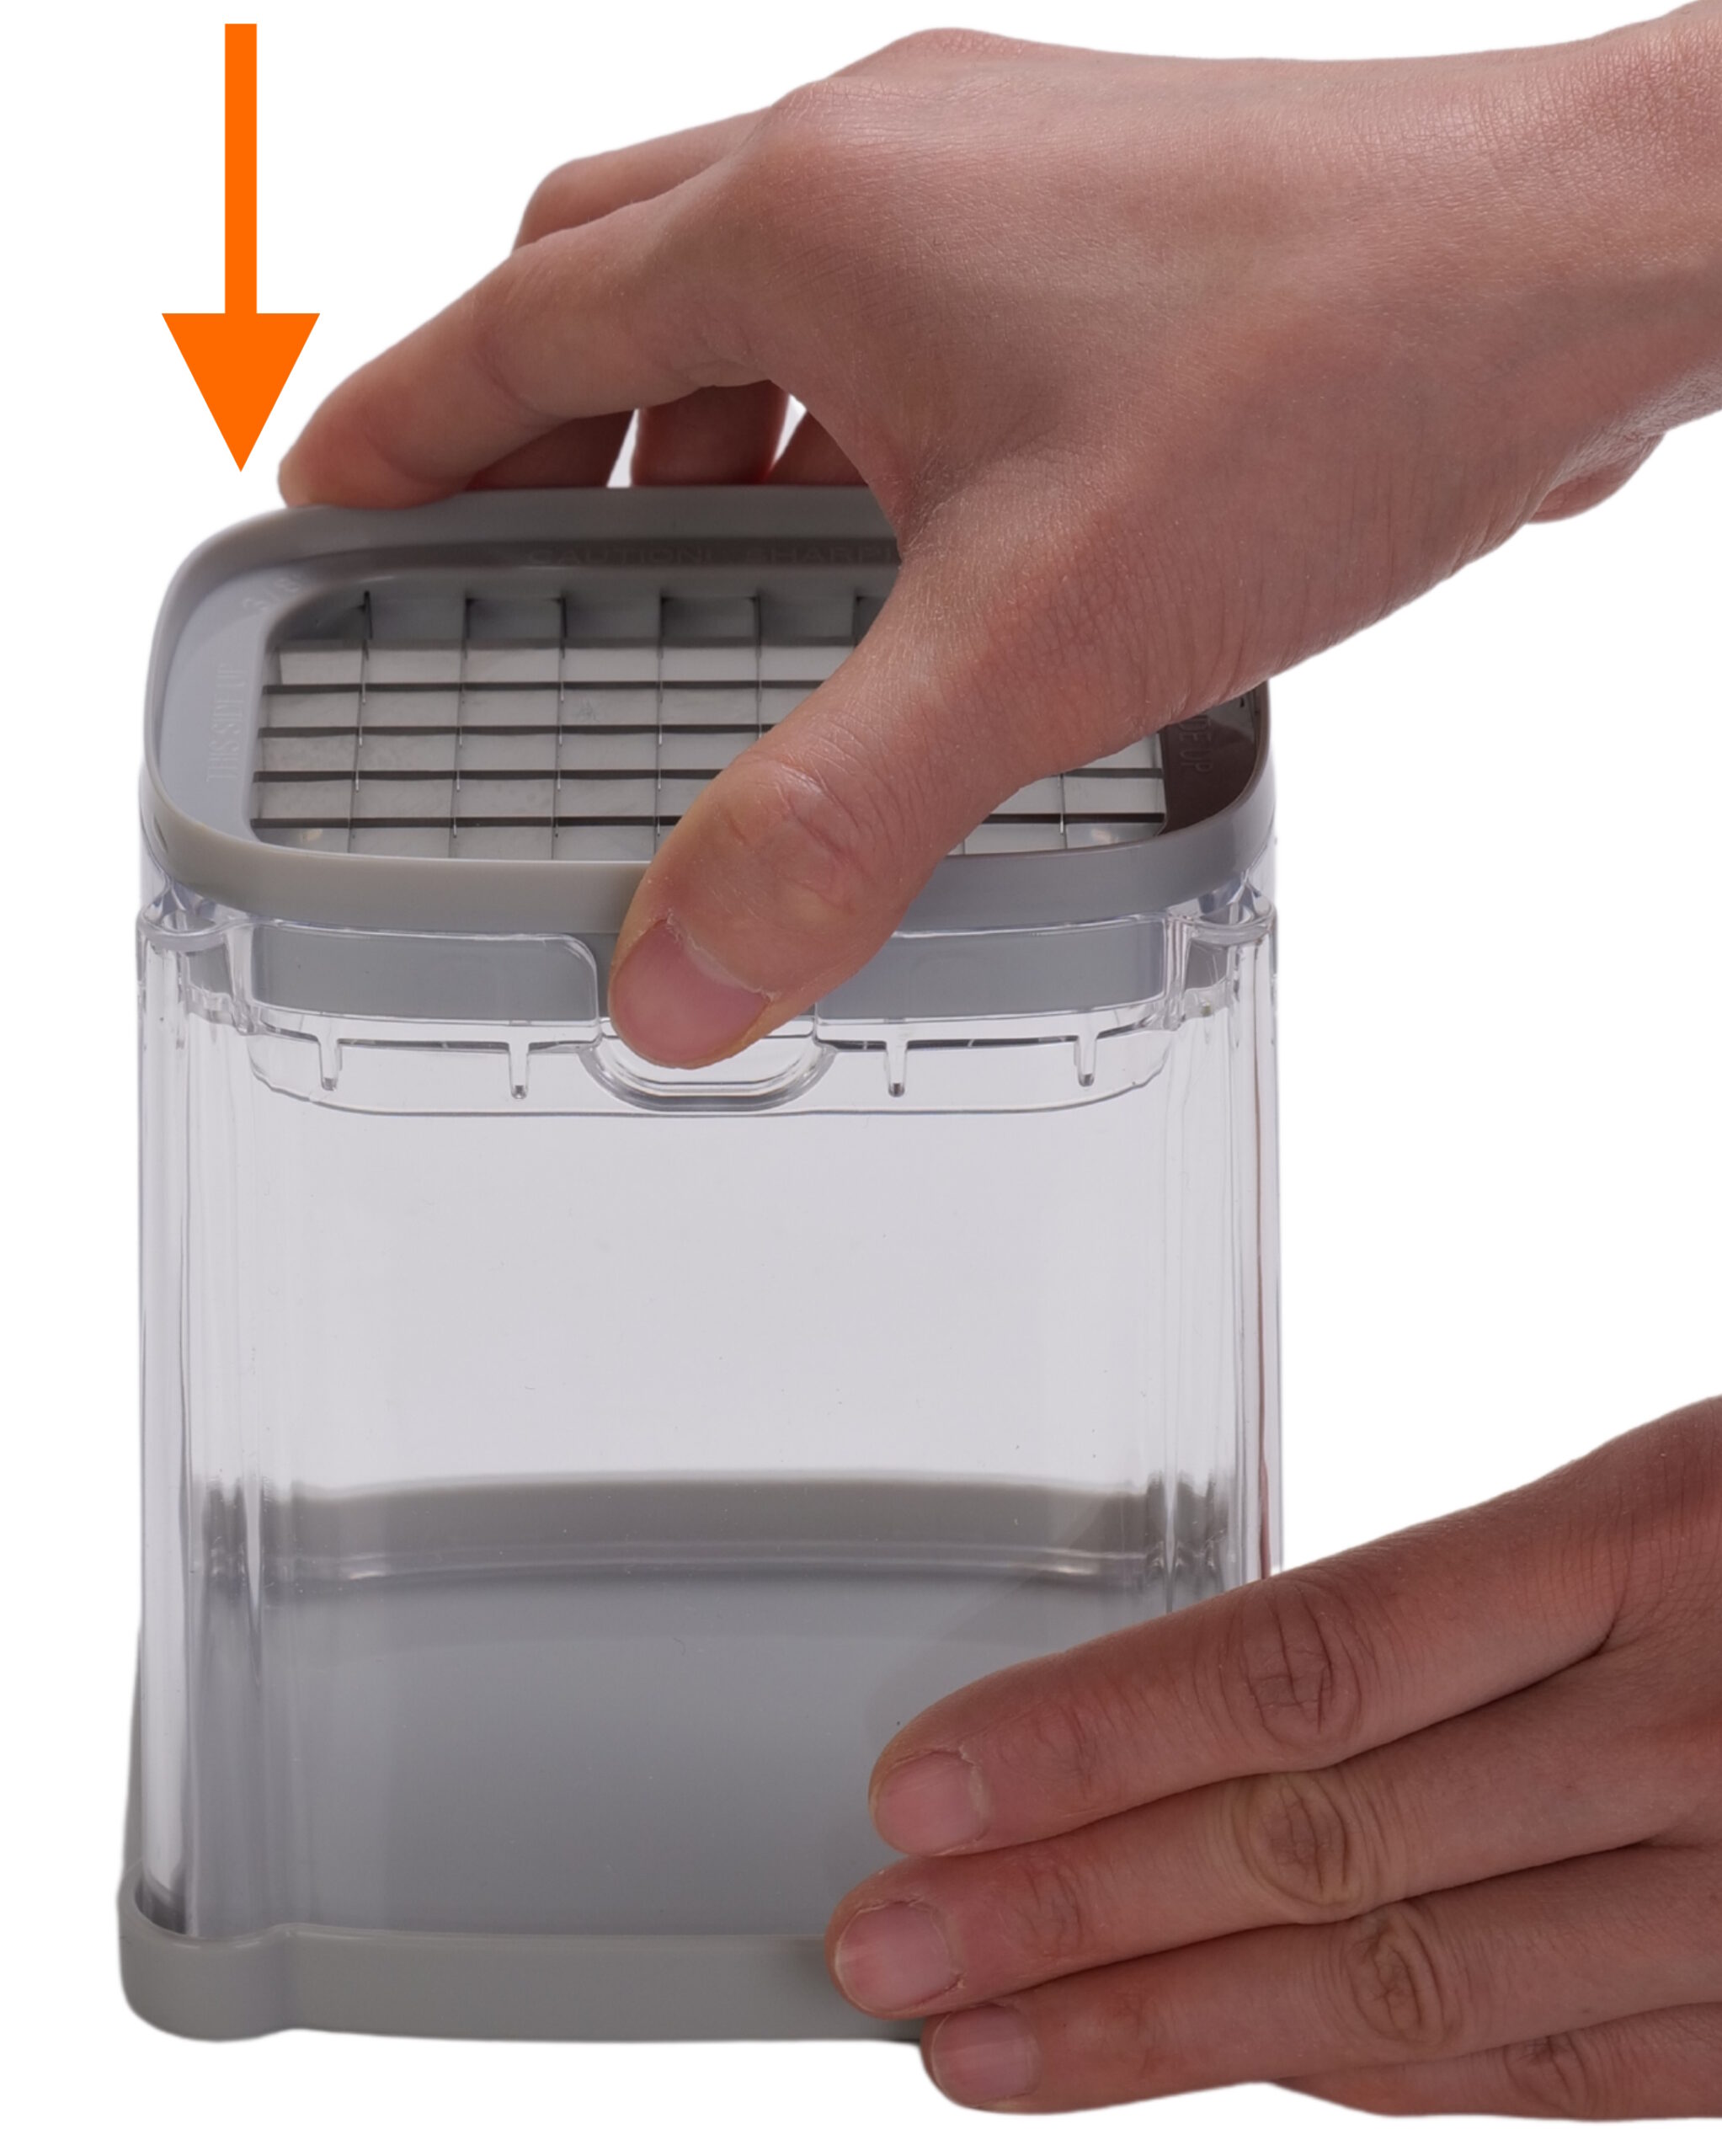
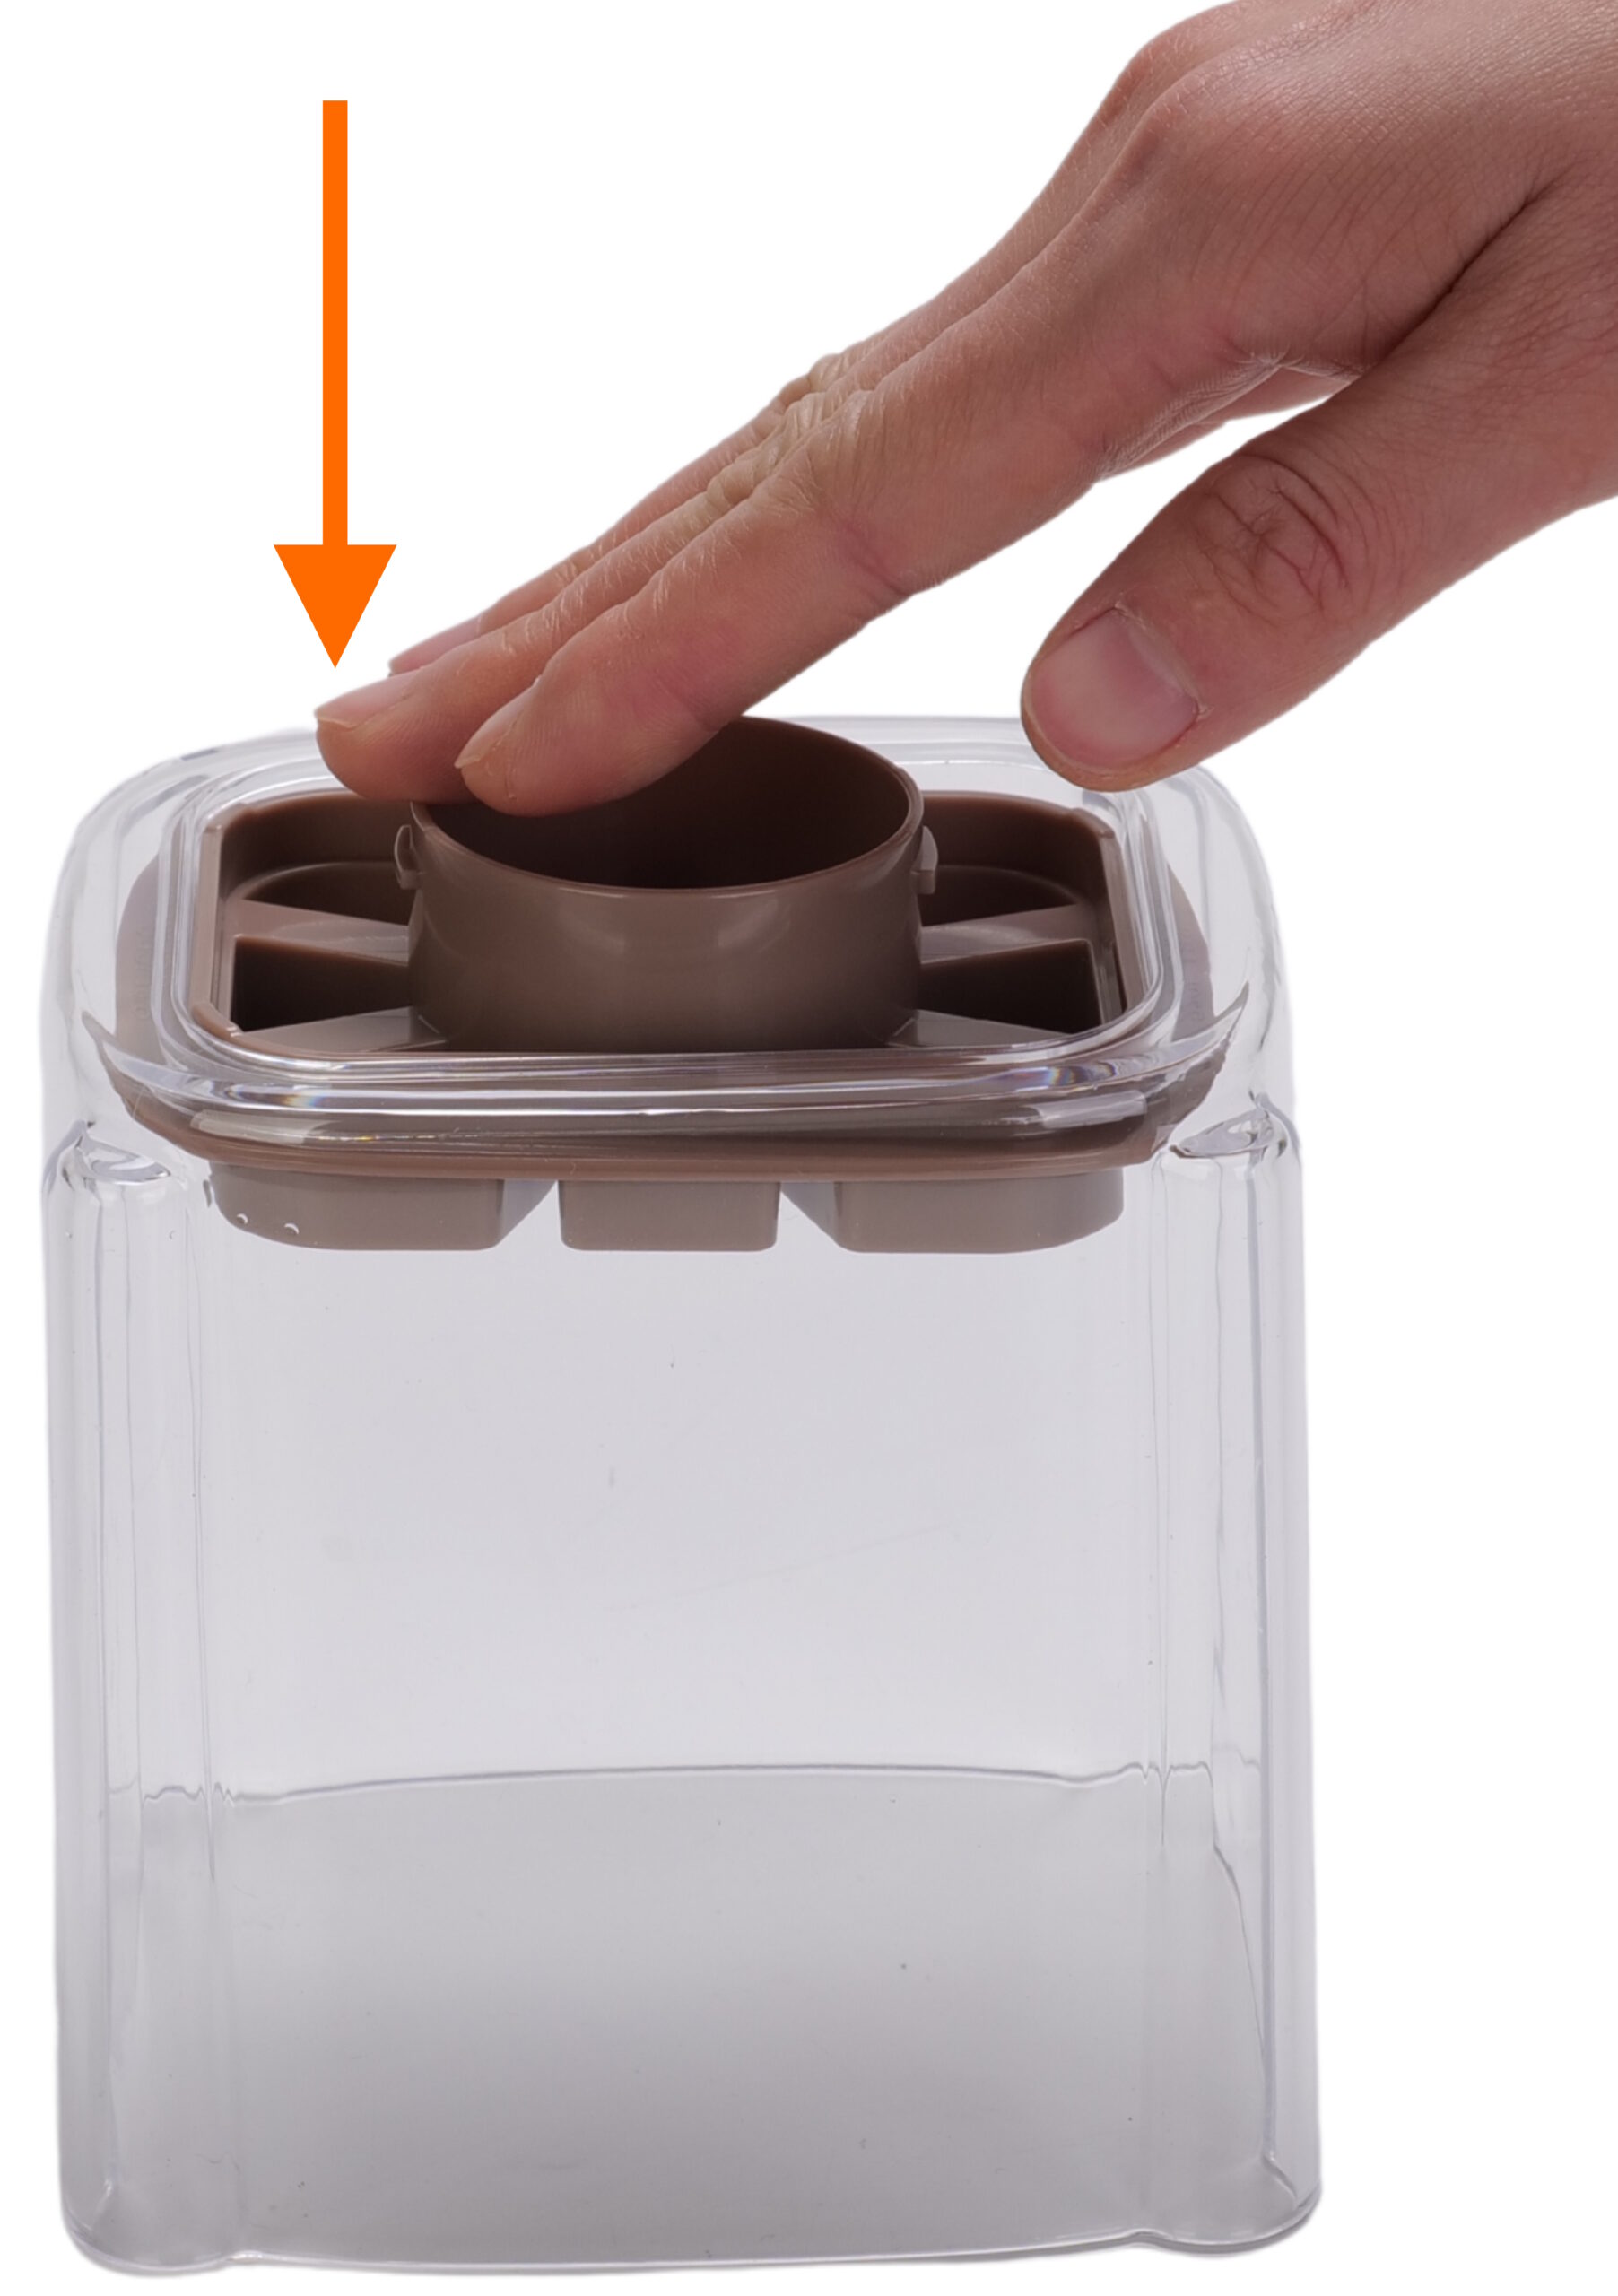
- Put the outer body onto the pusher.
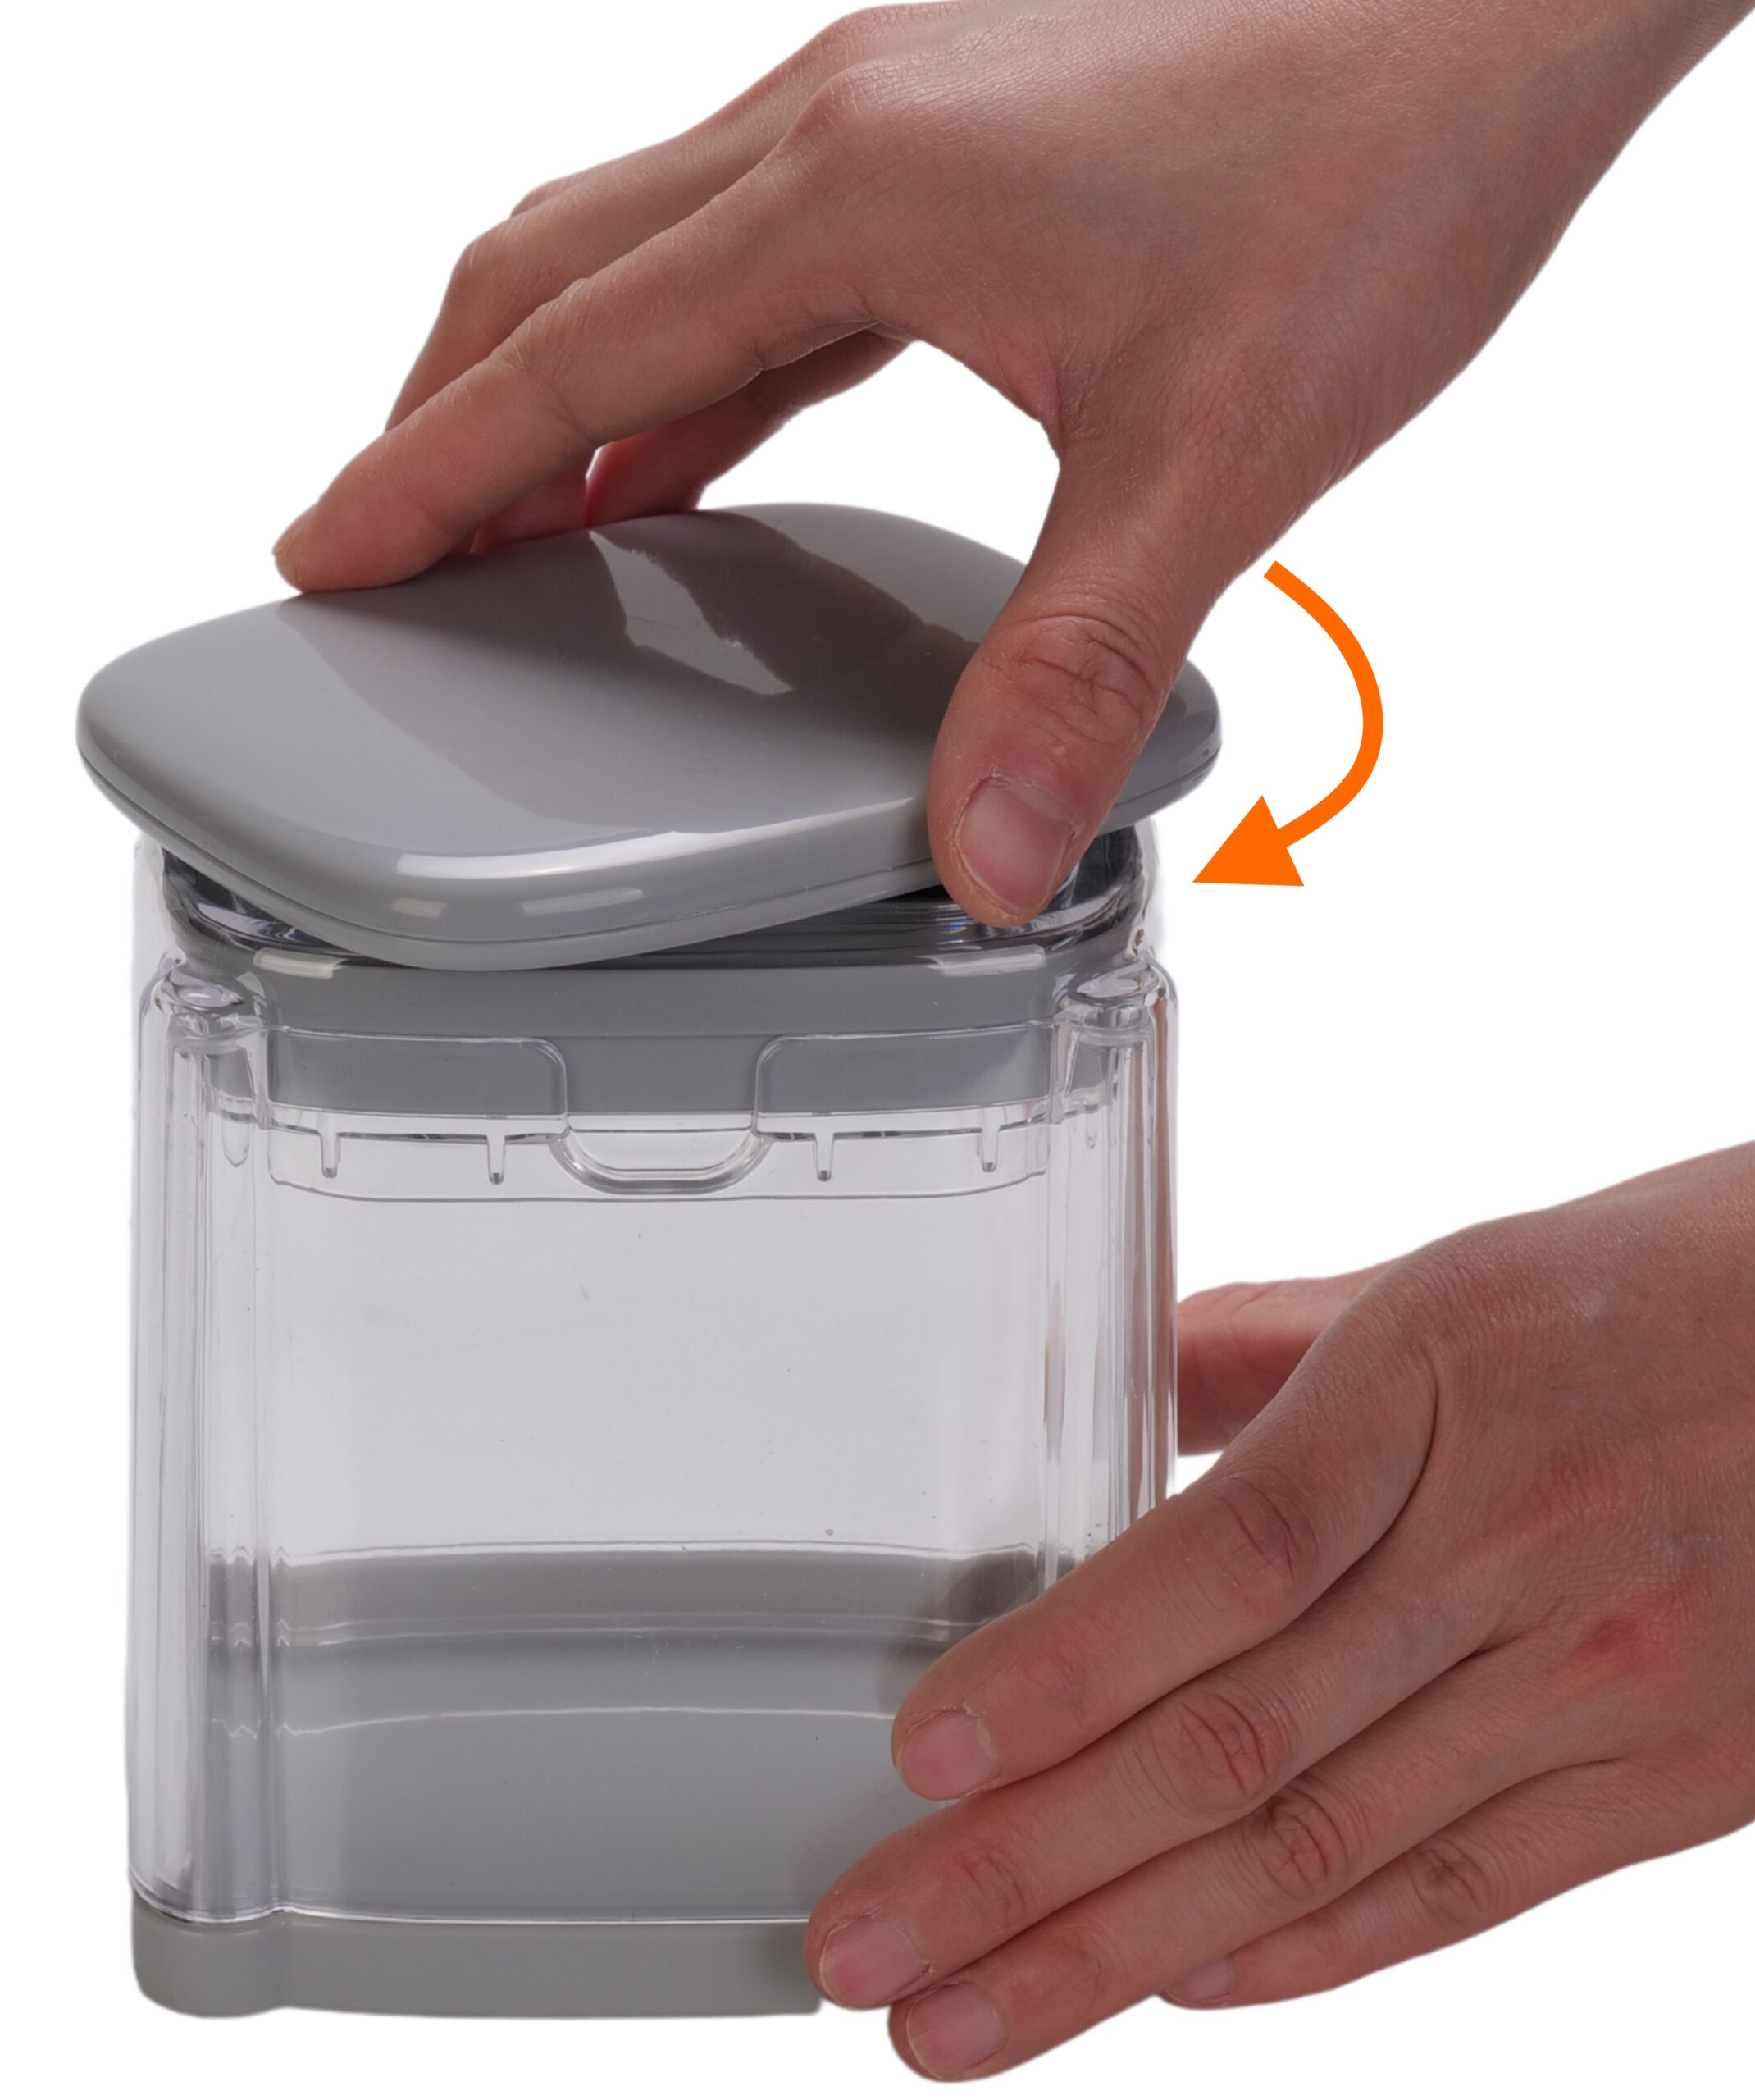
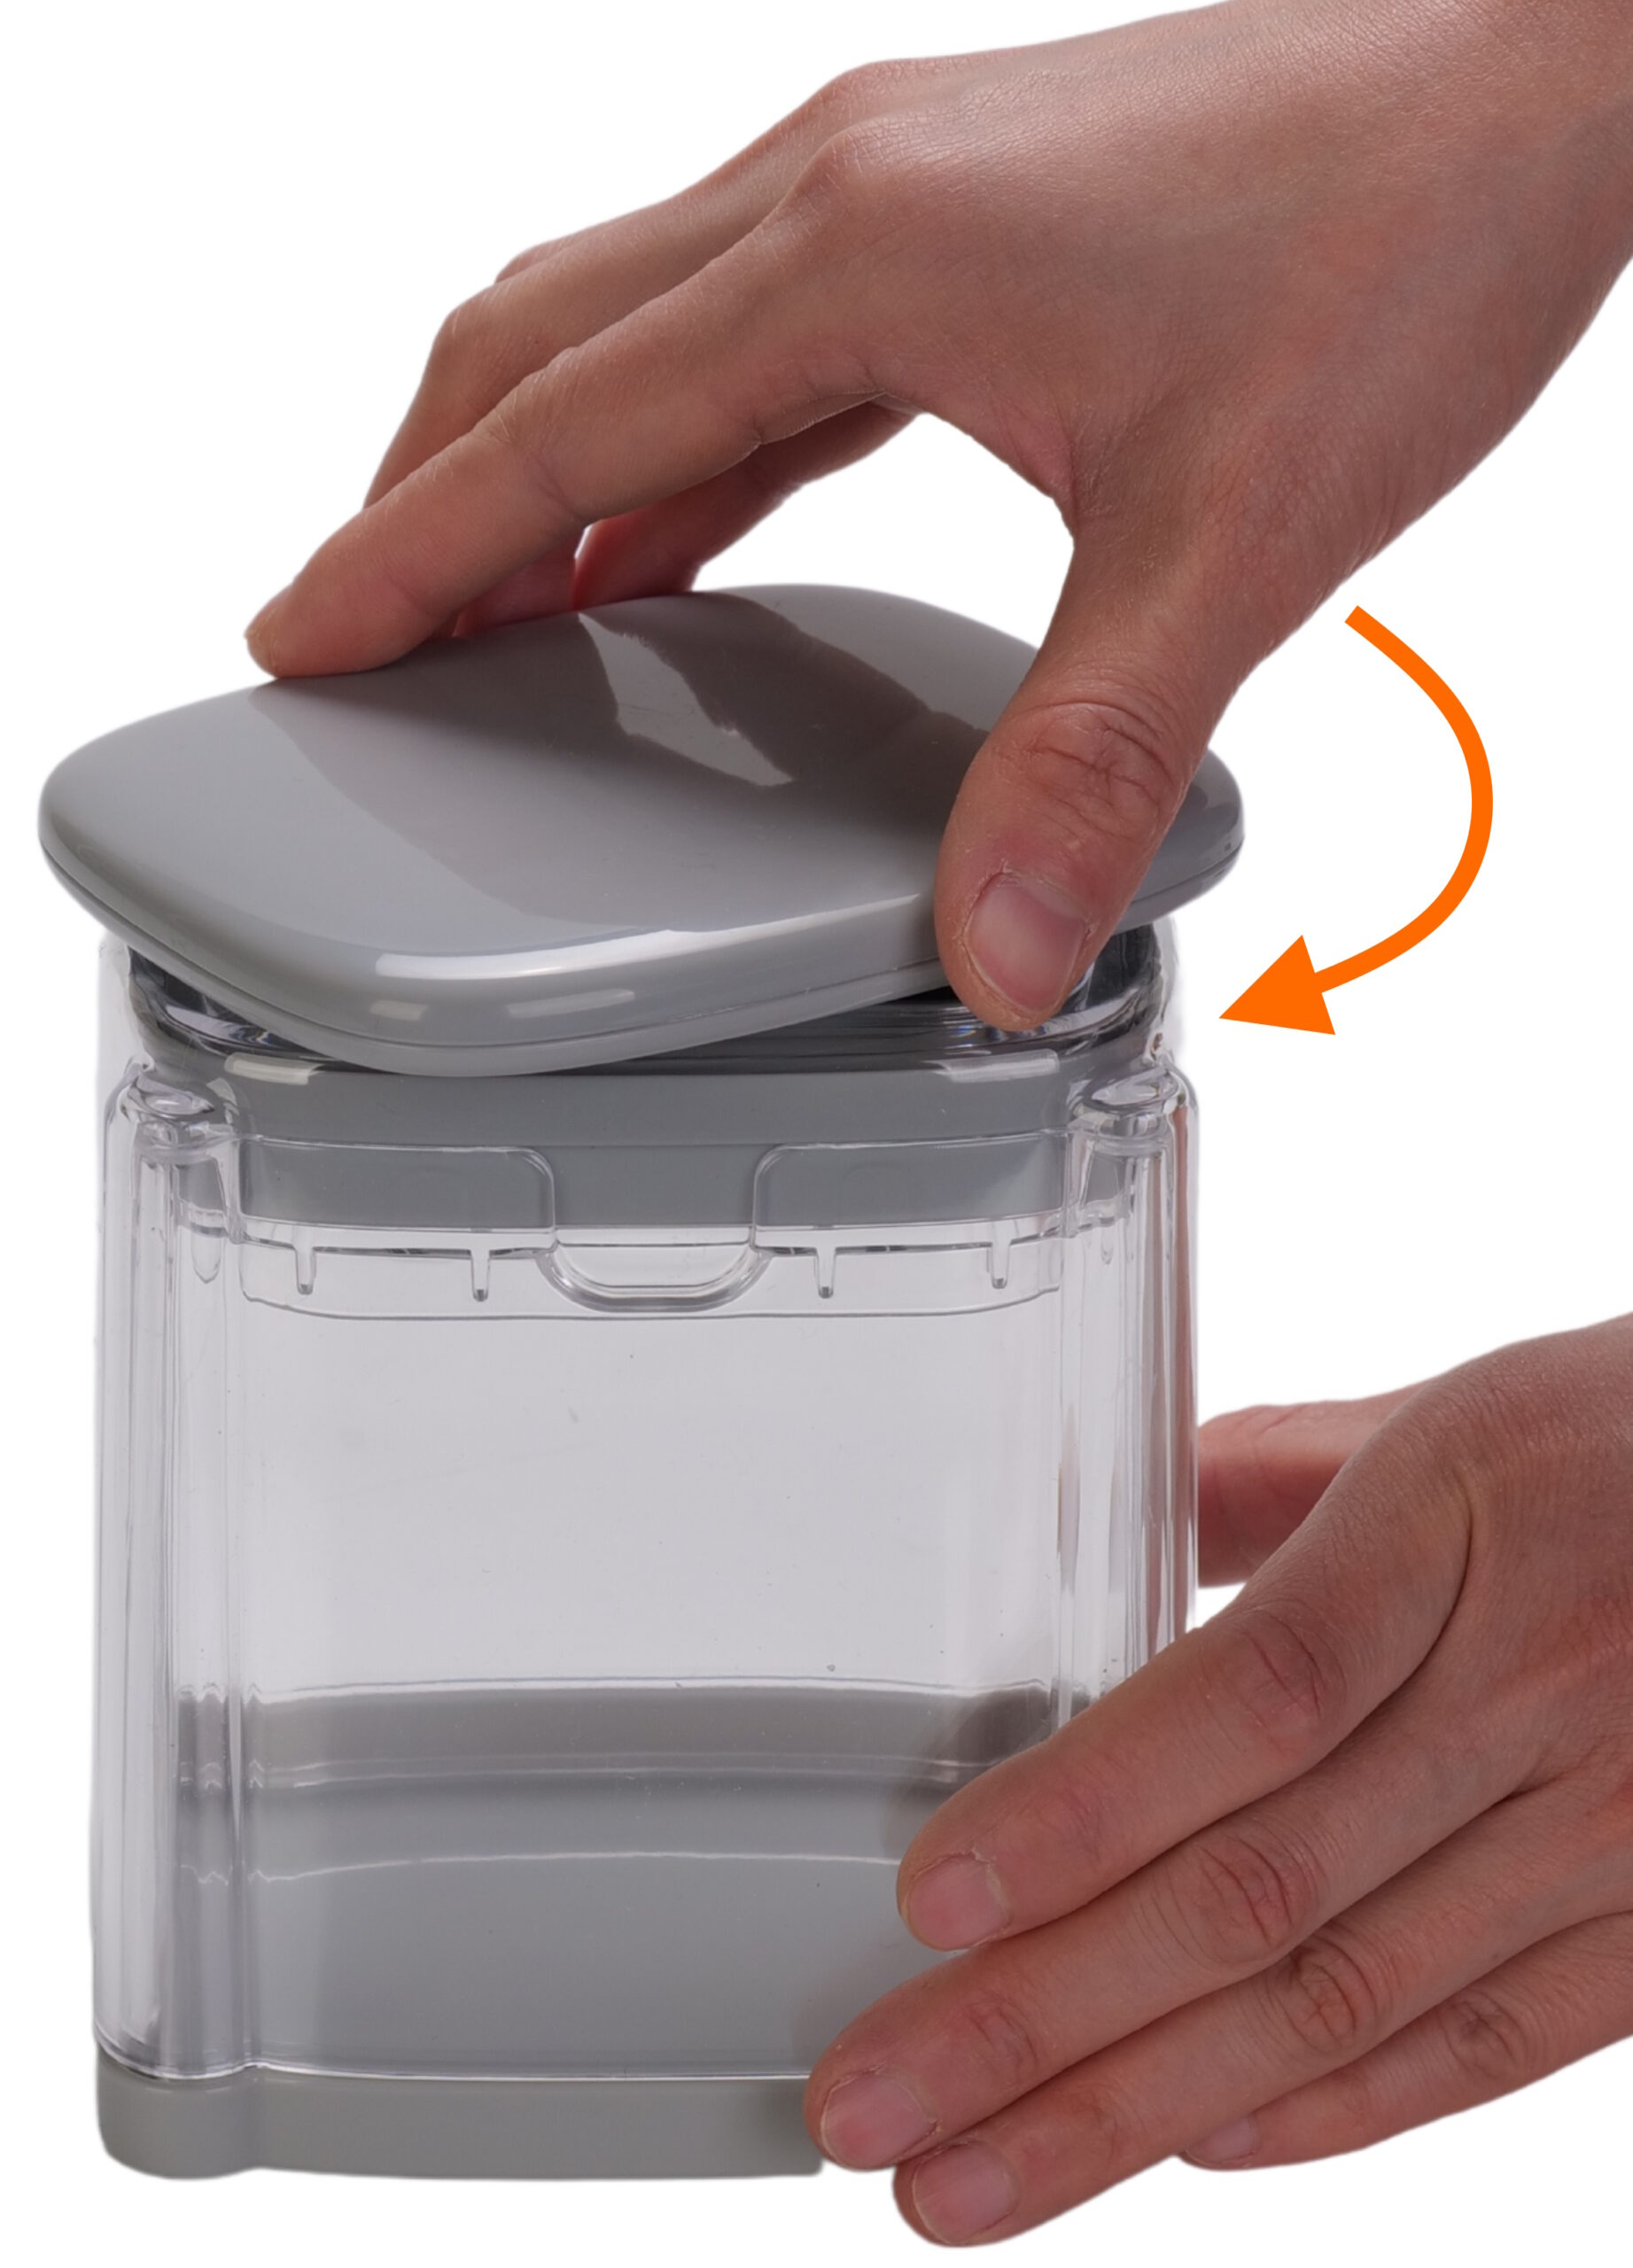
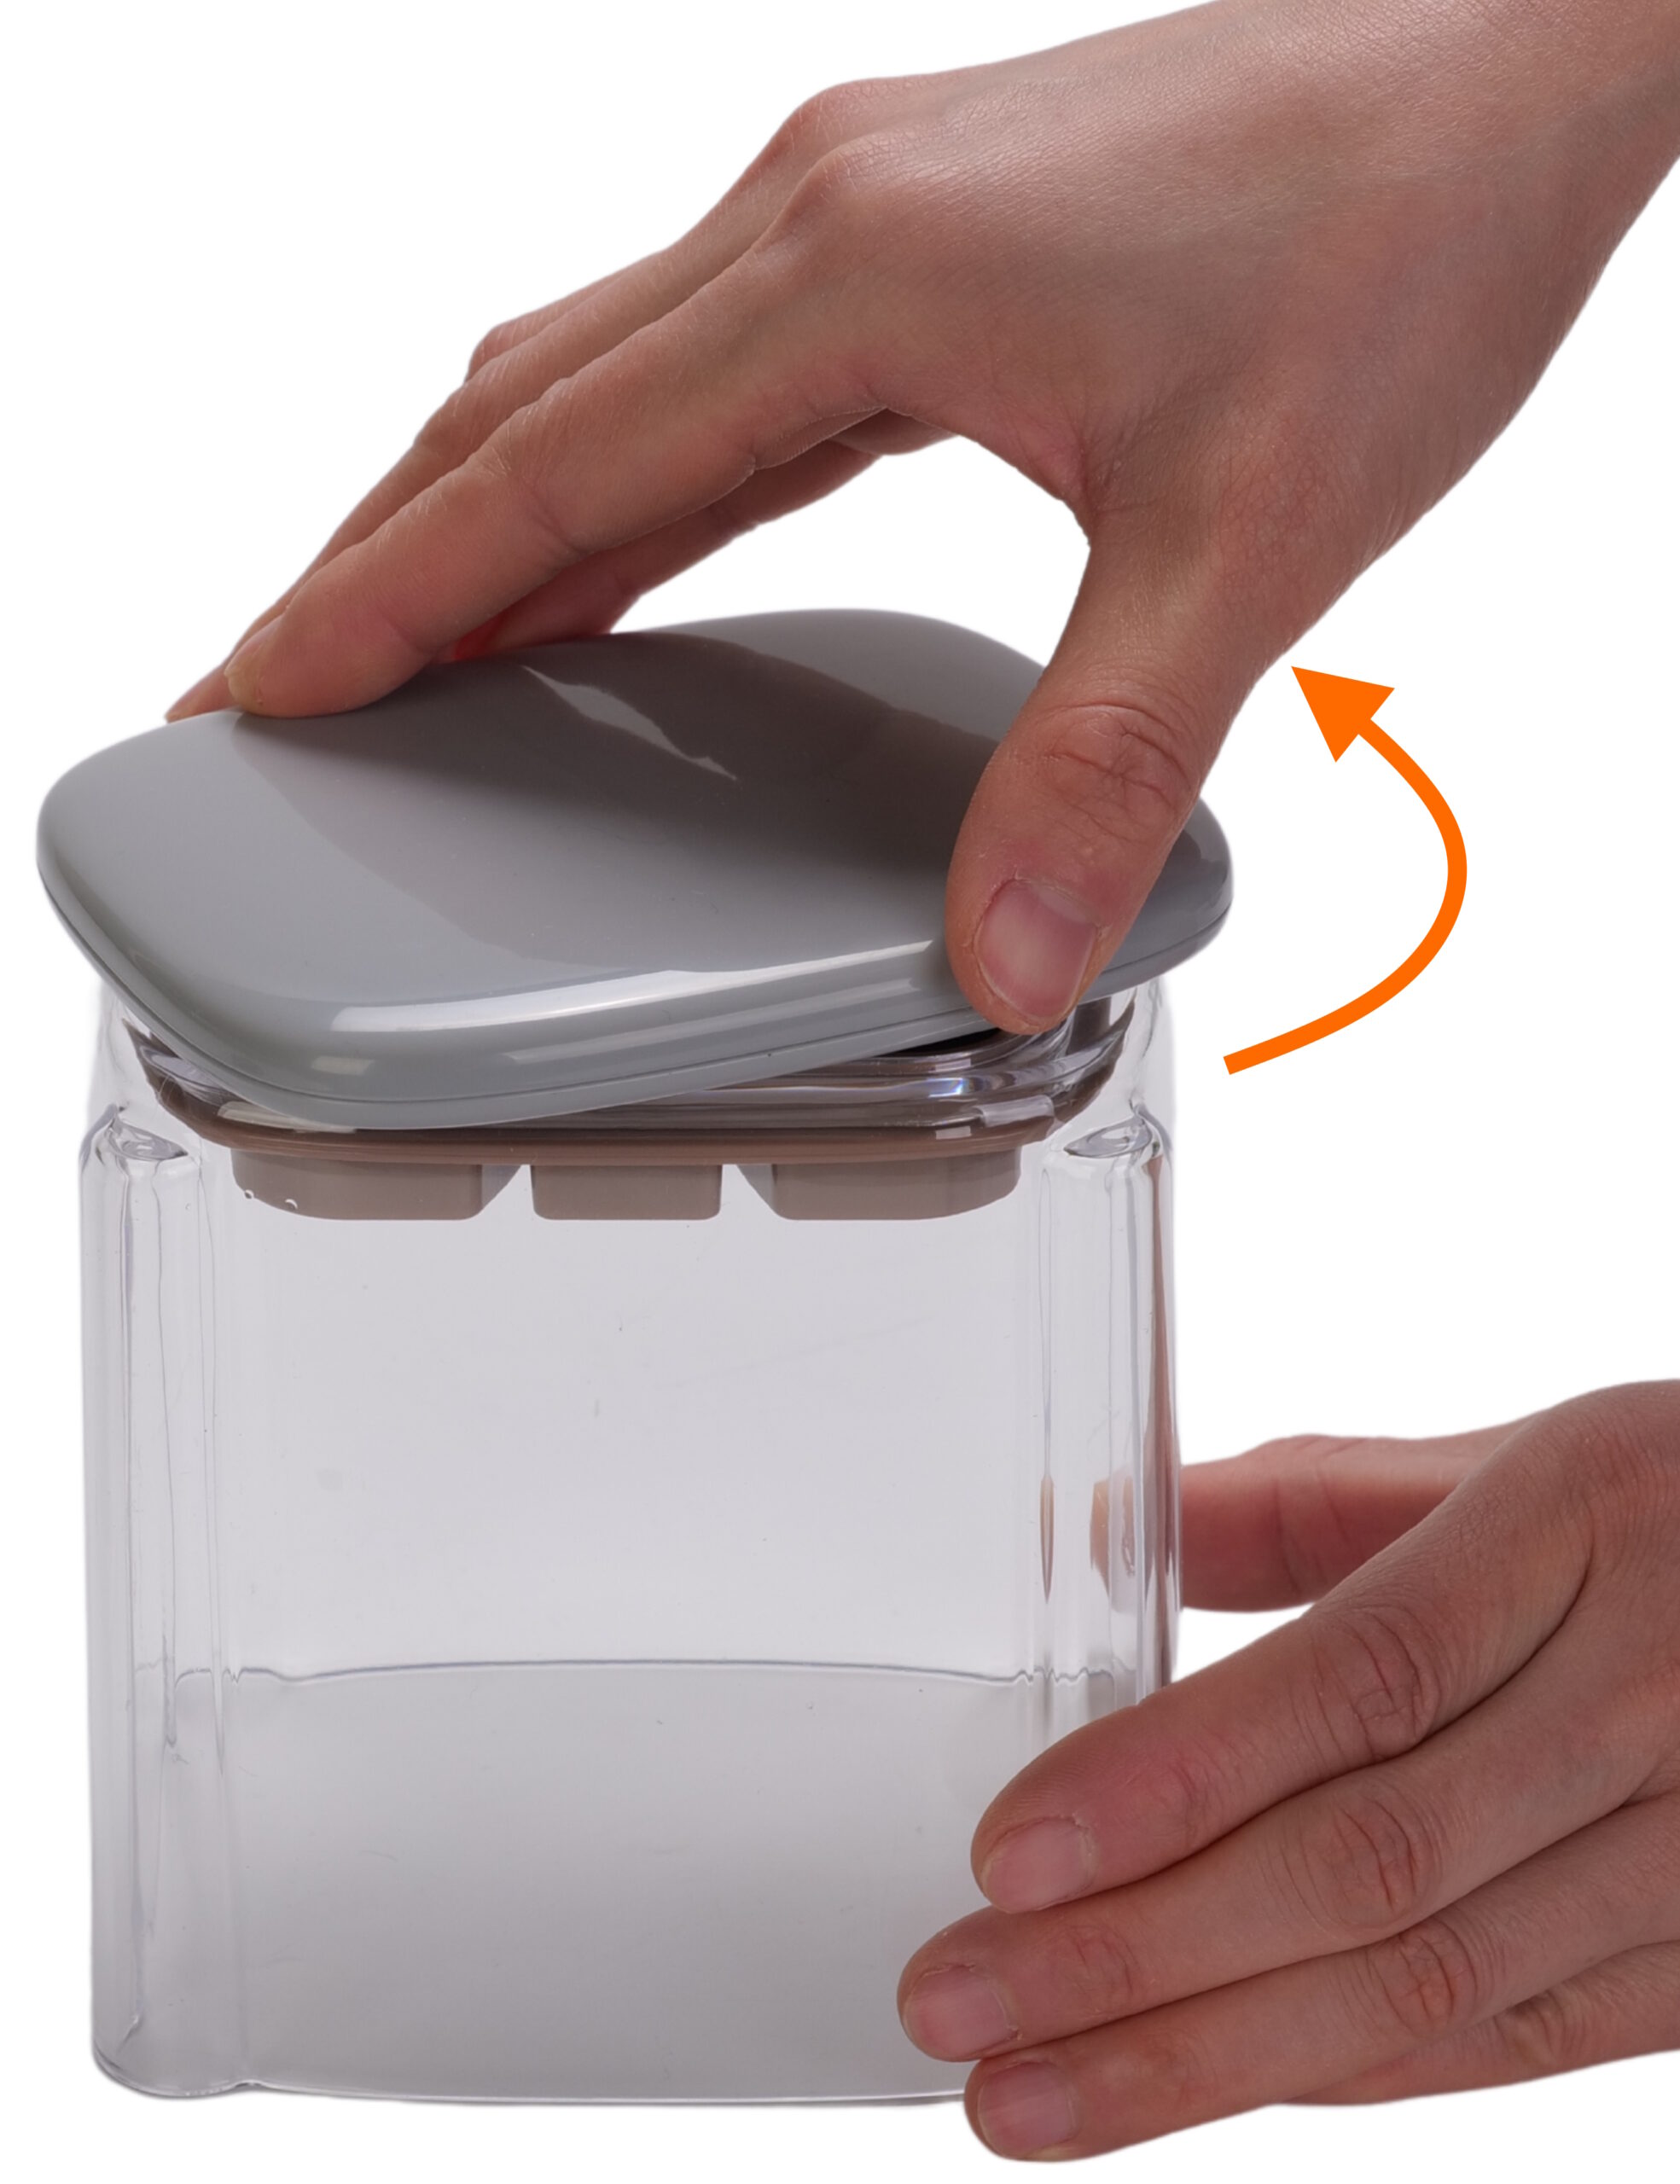
- Put the press plate on top, then turn it clockwise so that it locks into the pusher.
-
Cut the 2 ends of the vegetable flat. Now, remove the outer body, then place the vegetable vertically onto the blade. If one end of the vegetable is bigger than the other end, place the smaller end on the blade. It’s best to use your hand to push it down onto the blade initially so that the vegetable can stand firmly on the blade without falling down. This will help you chop more easily.
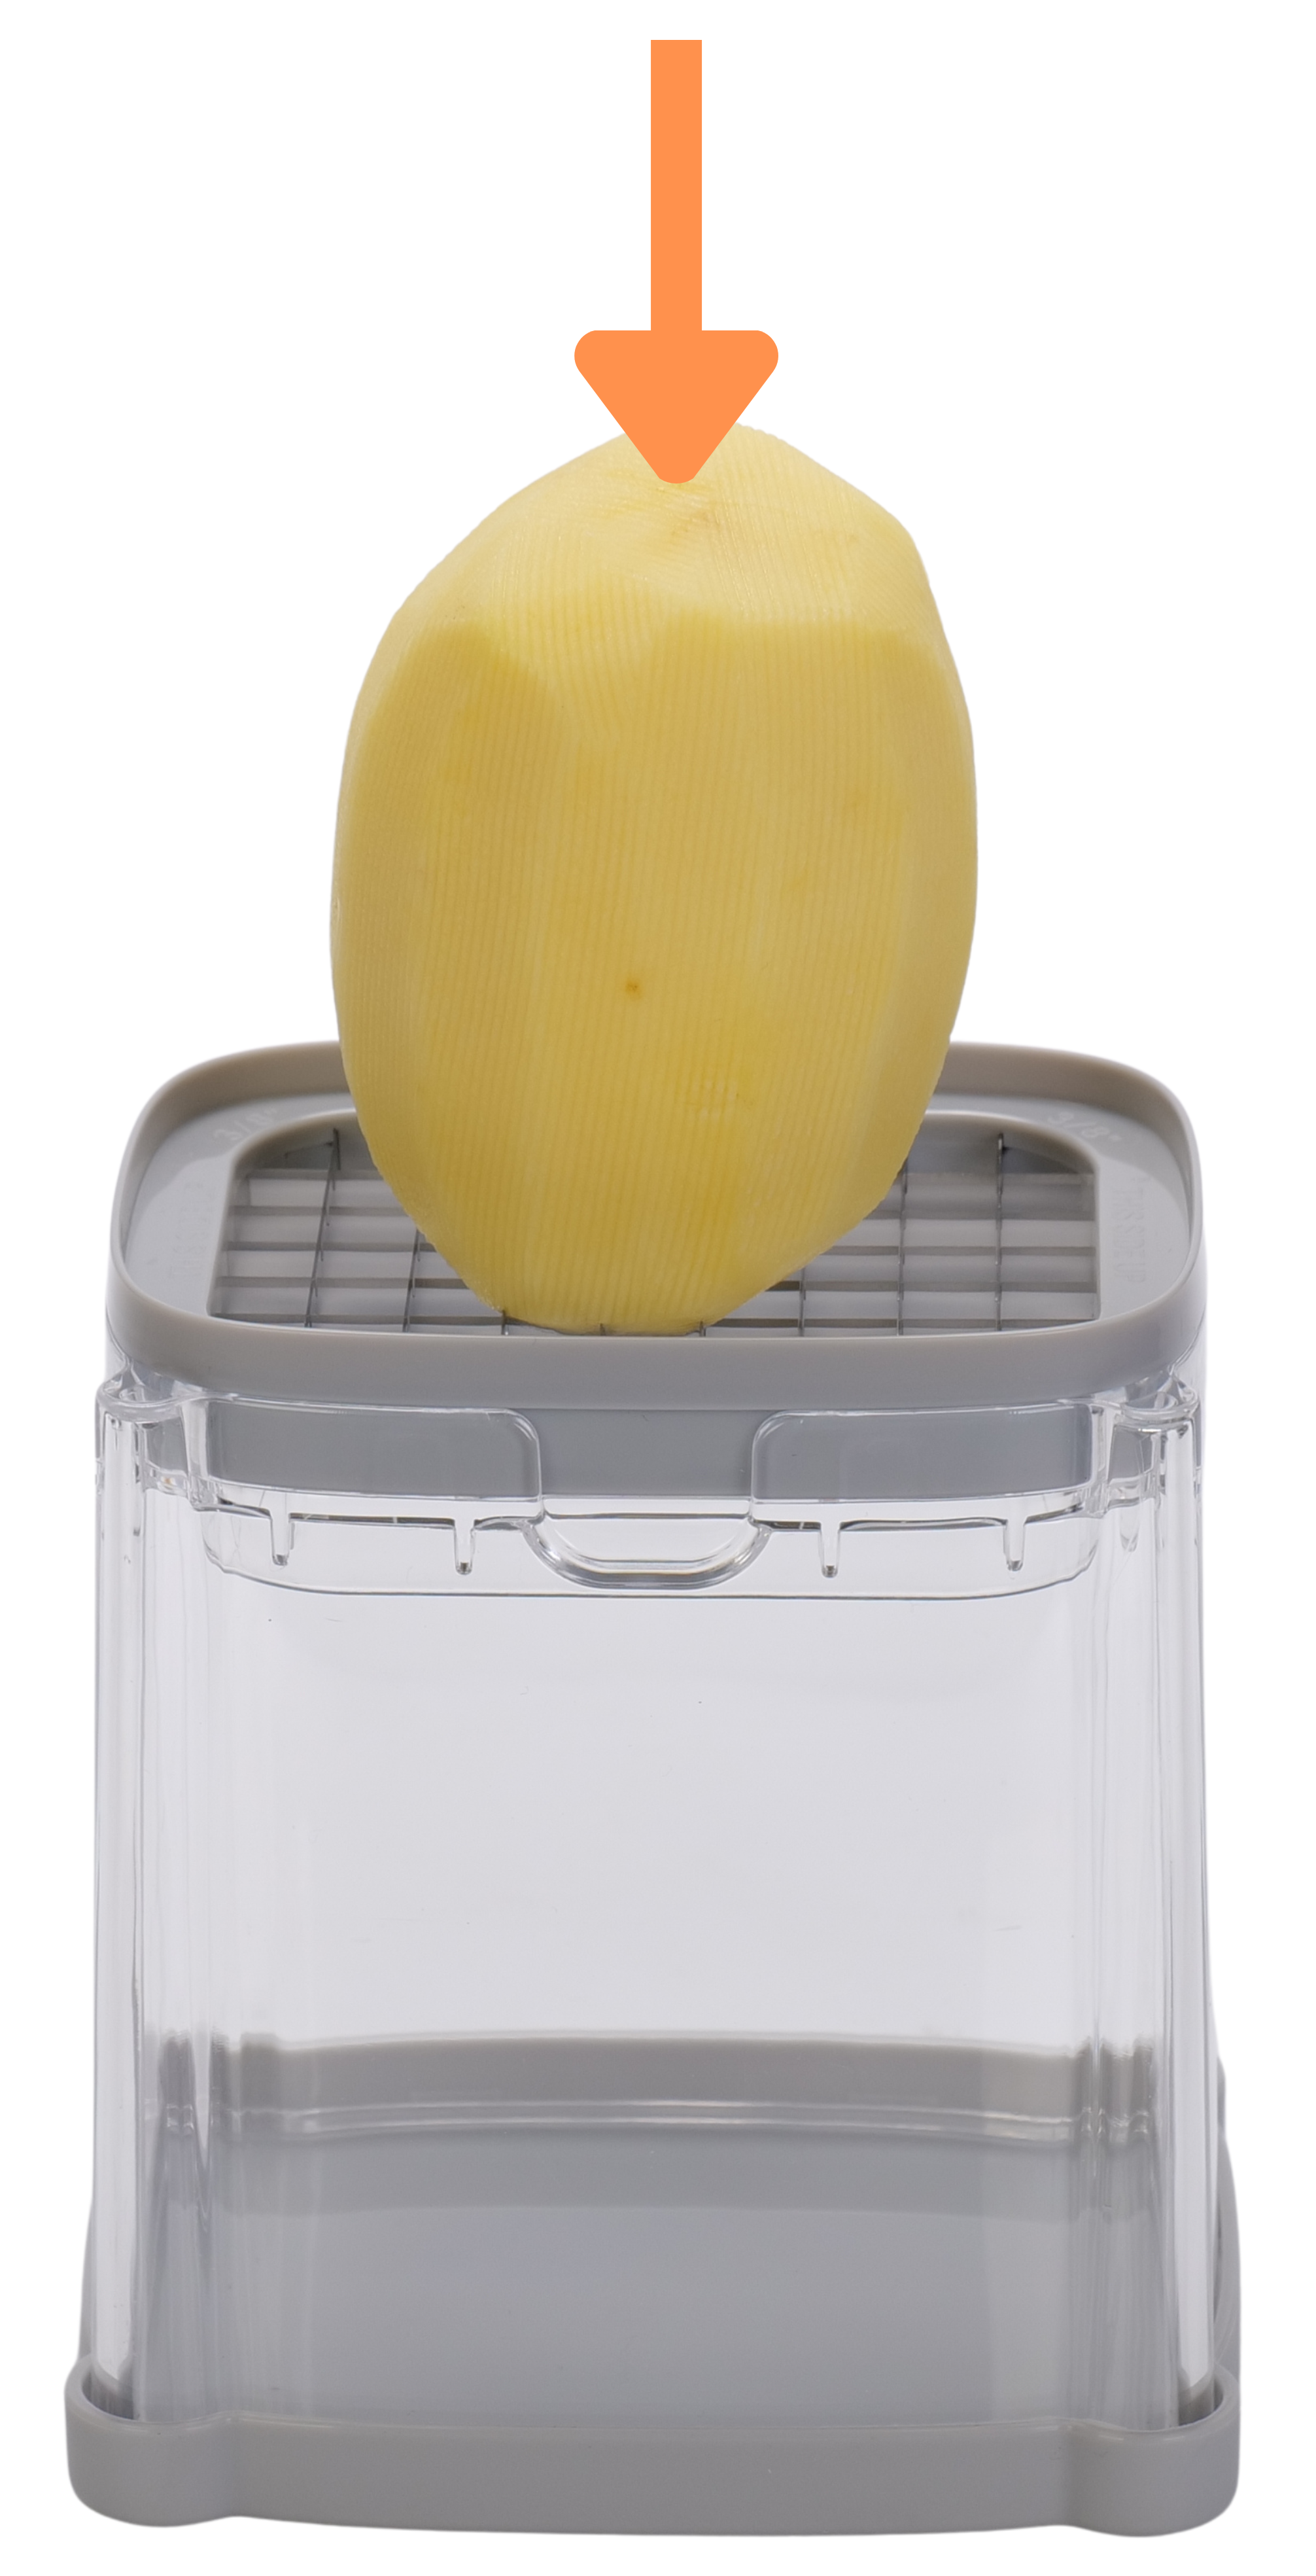
To prevent vegetables from being stuck in the blade, make sure all edges of the vegetable are within the blade cutting area.
-
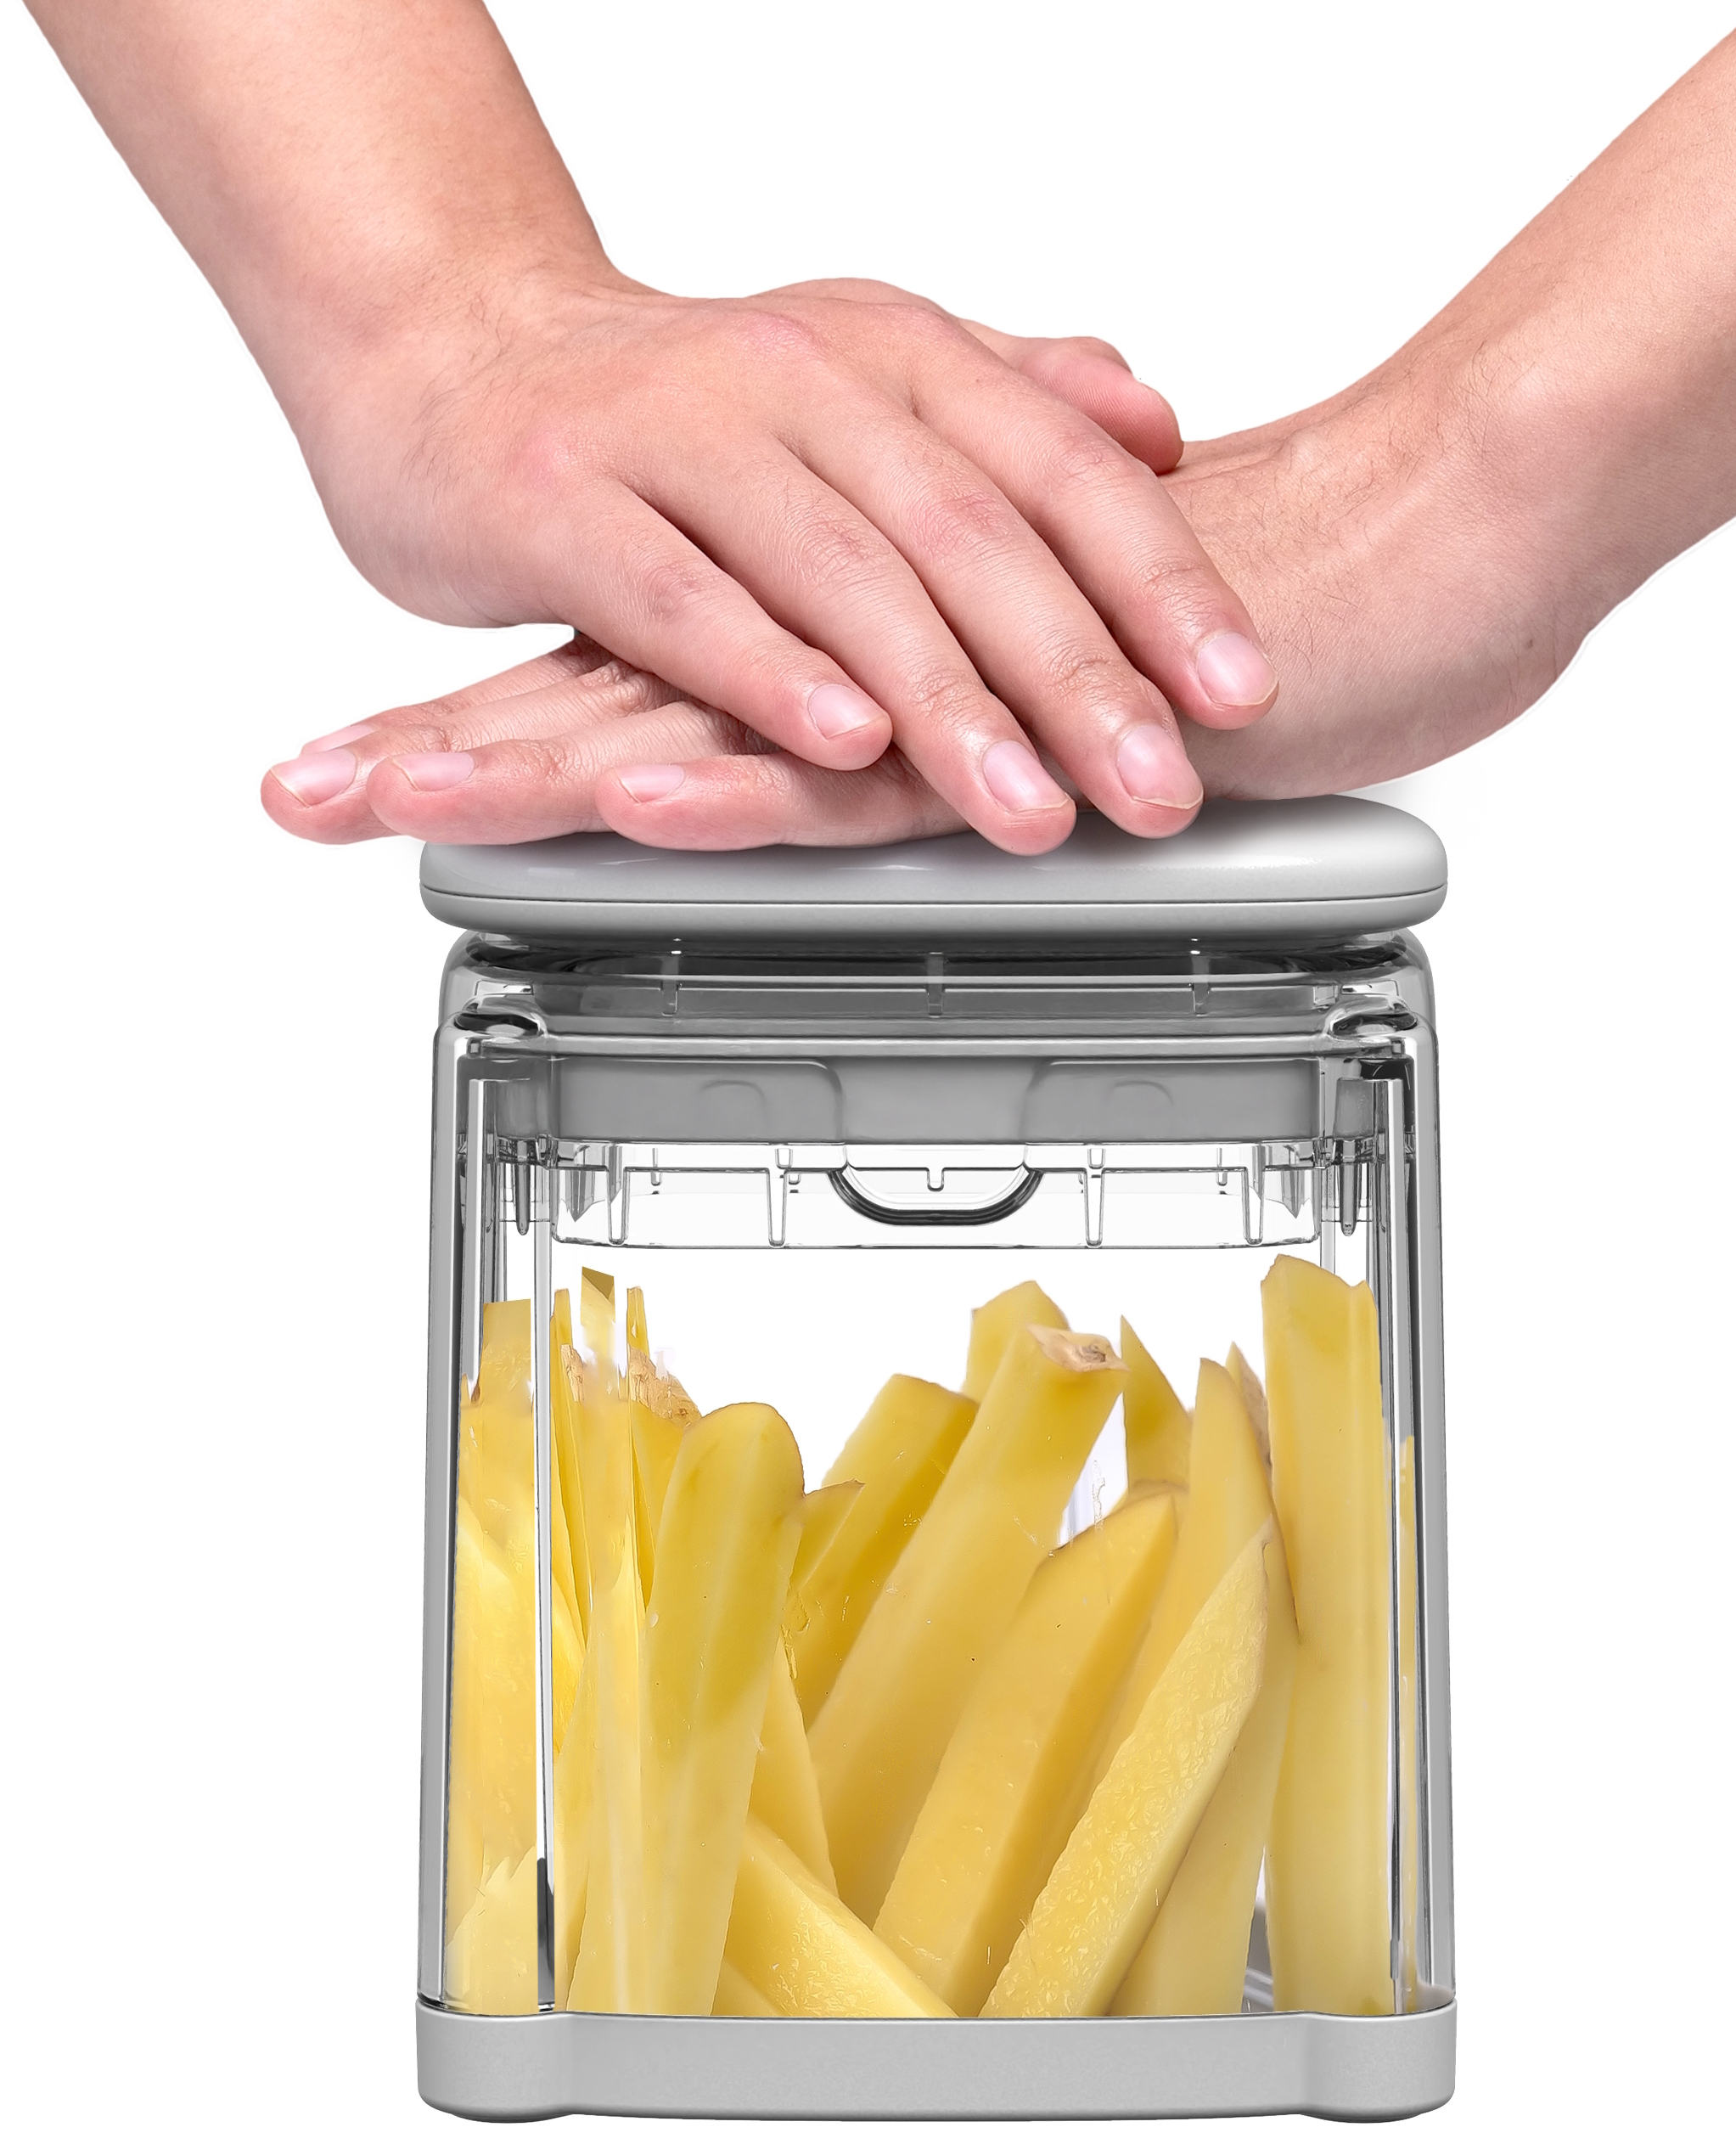
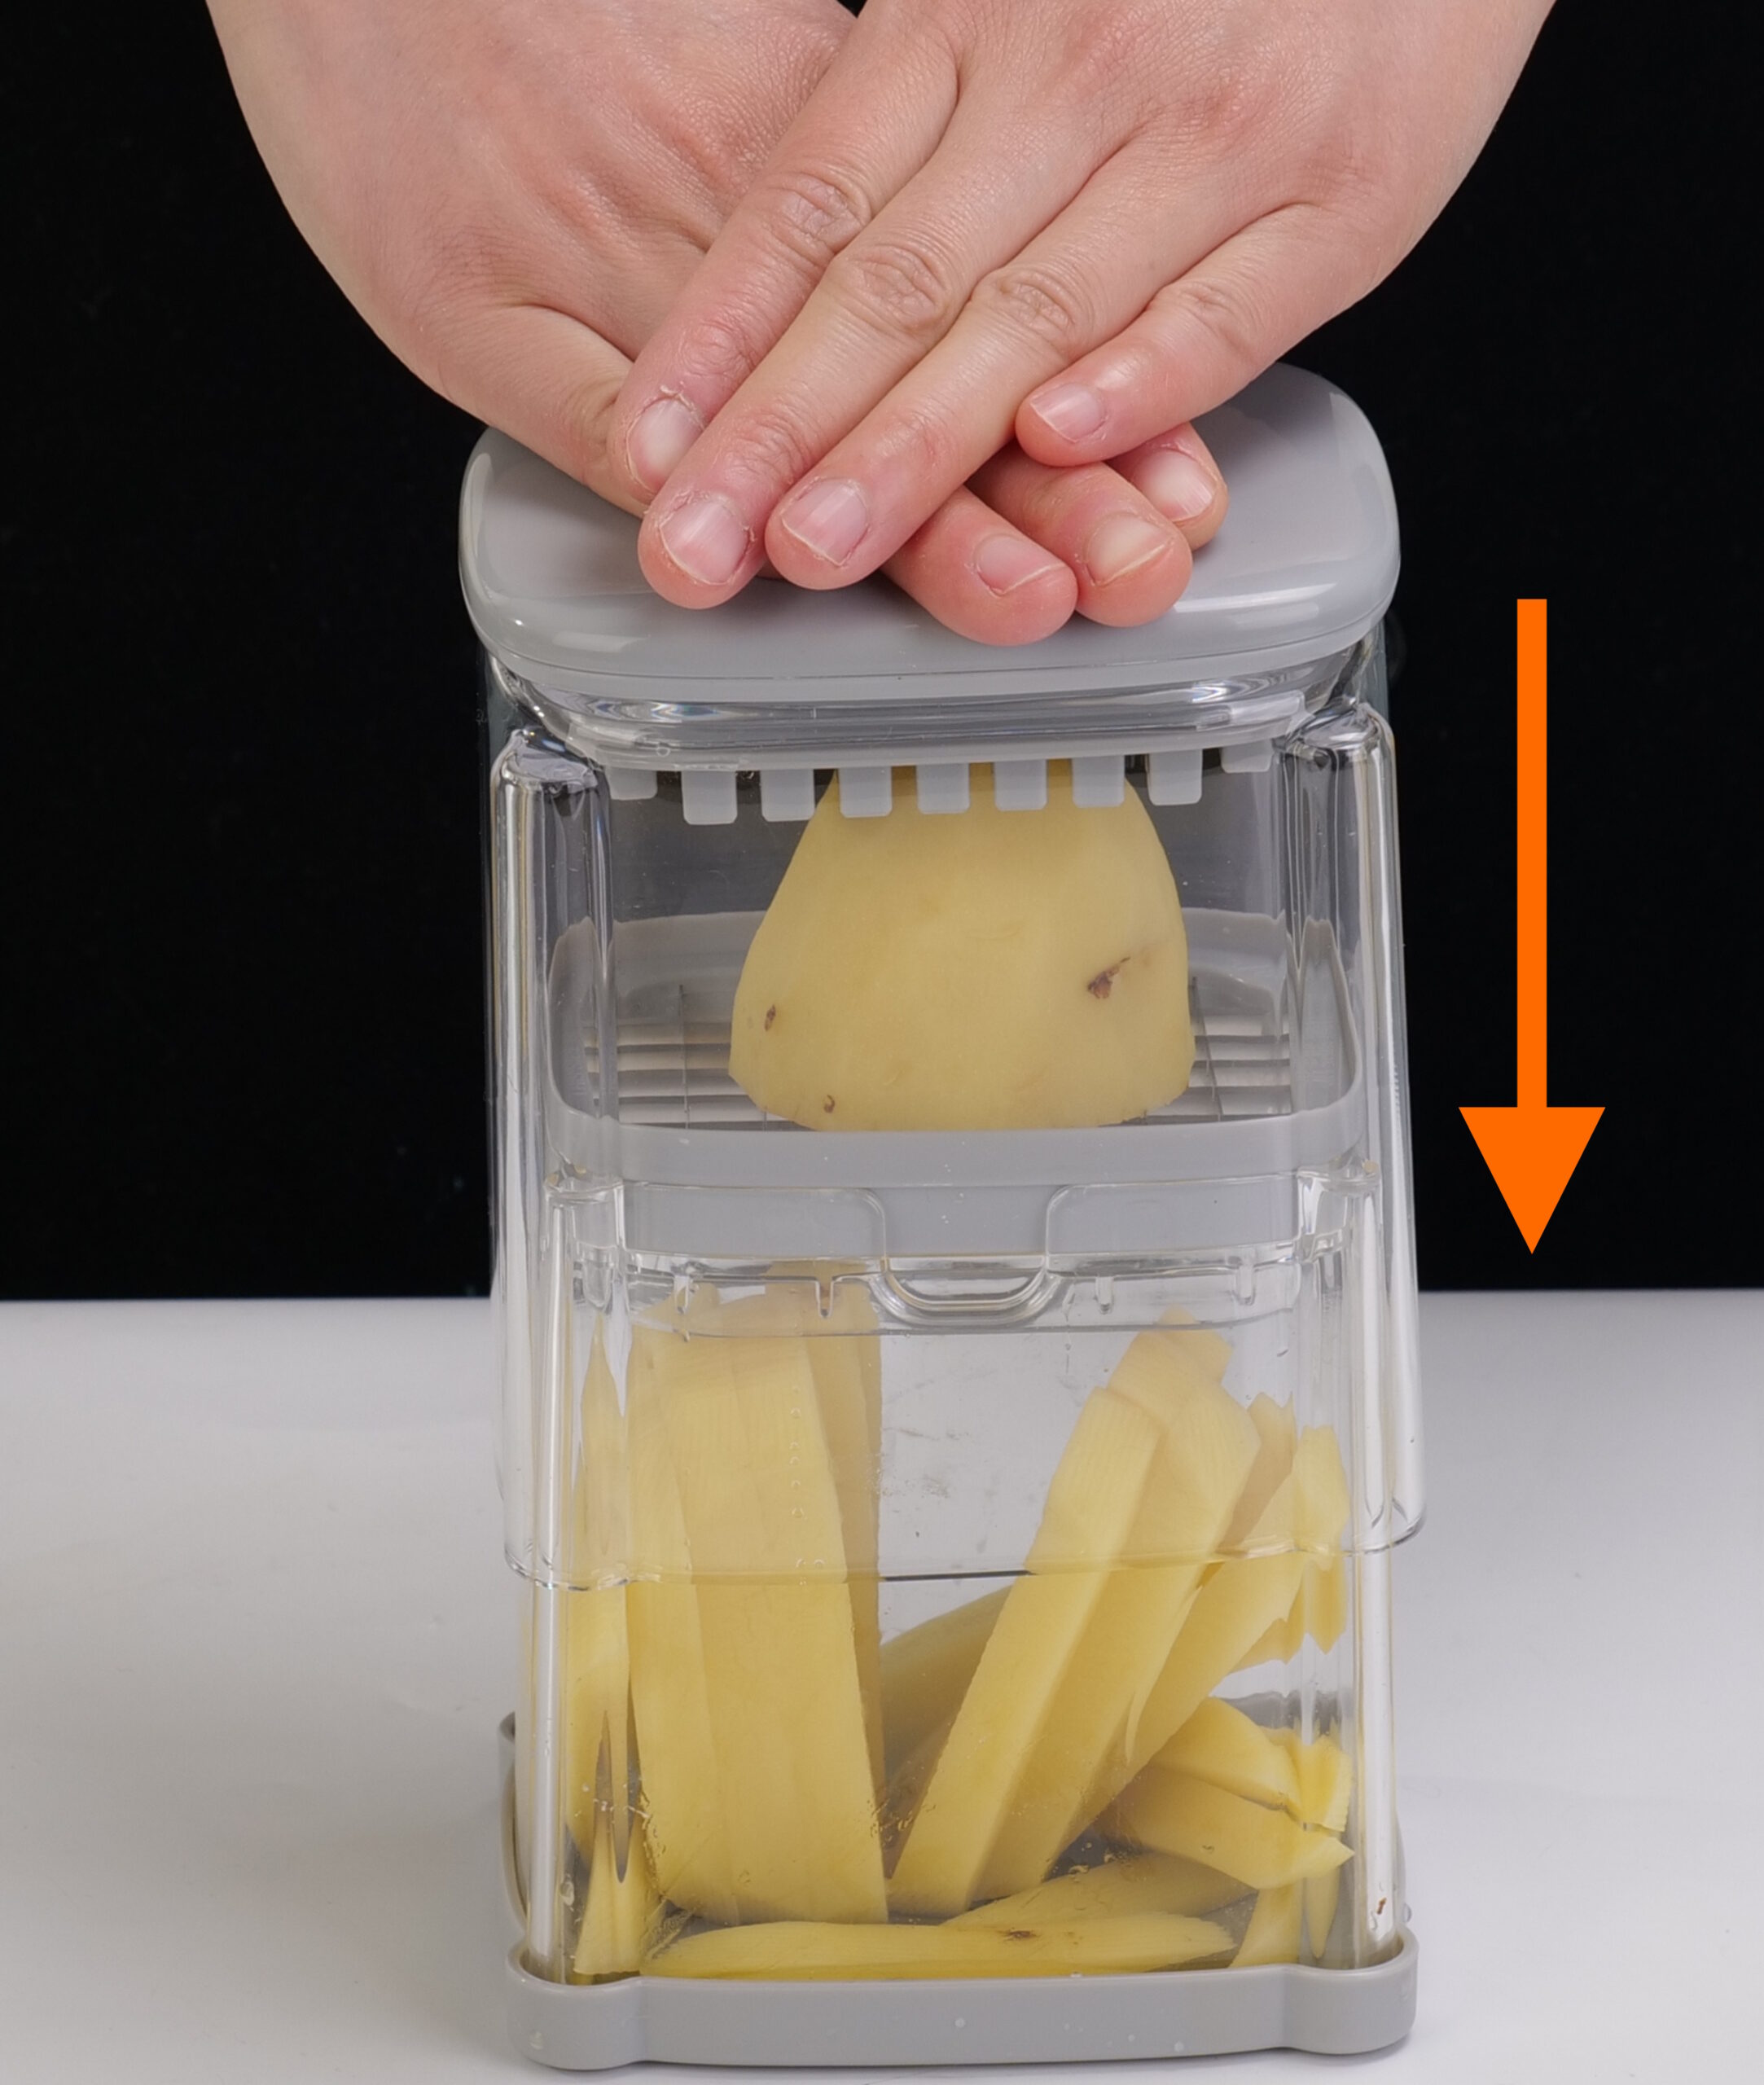
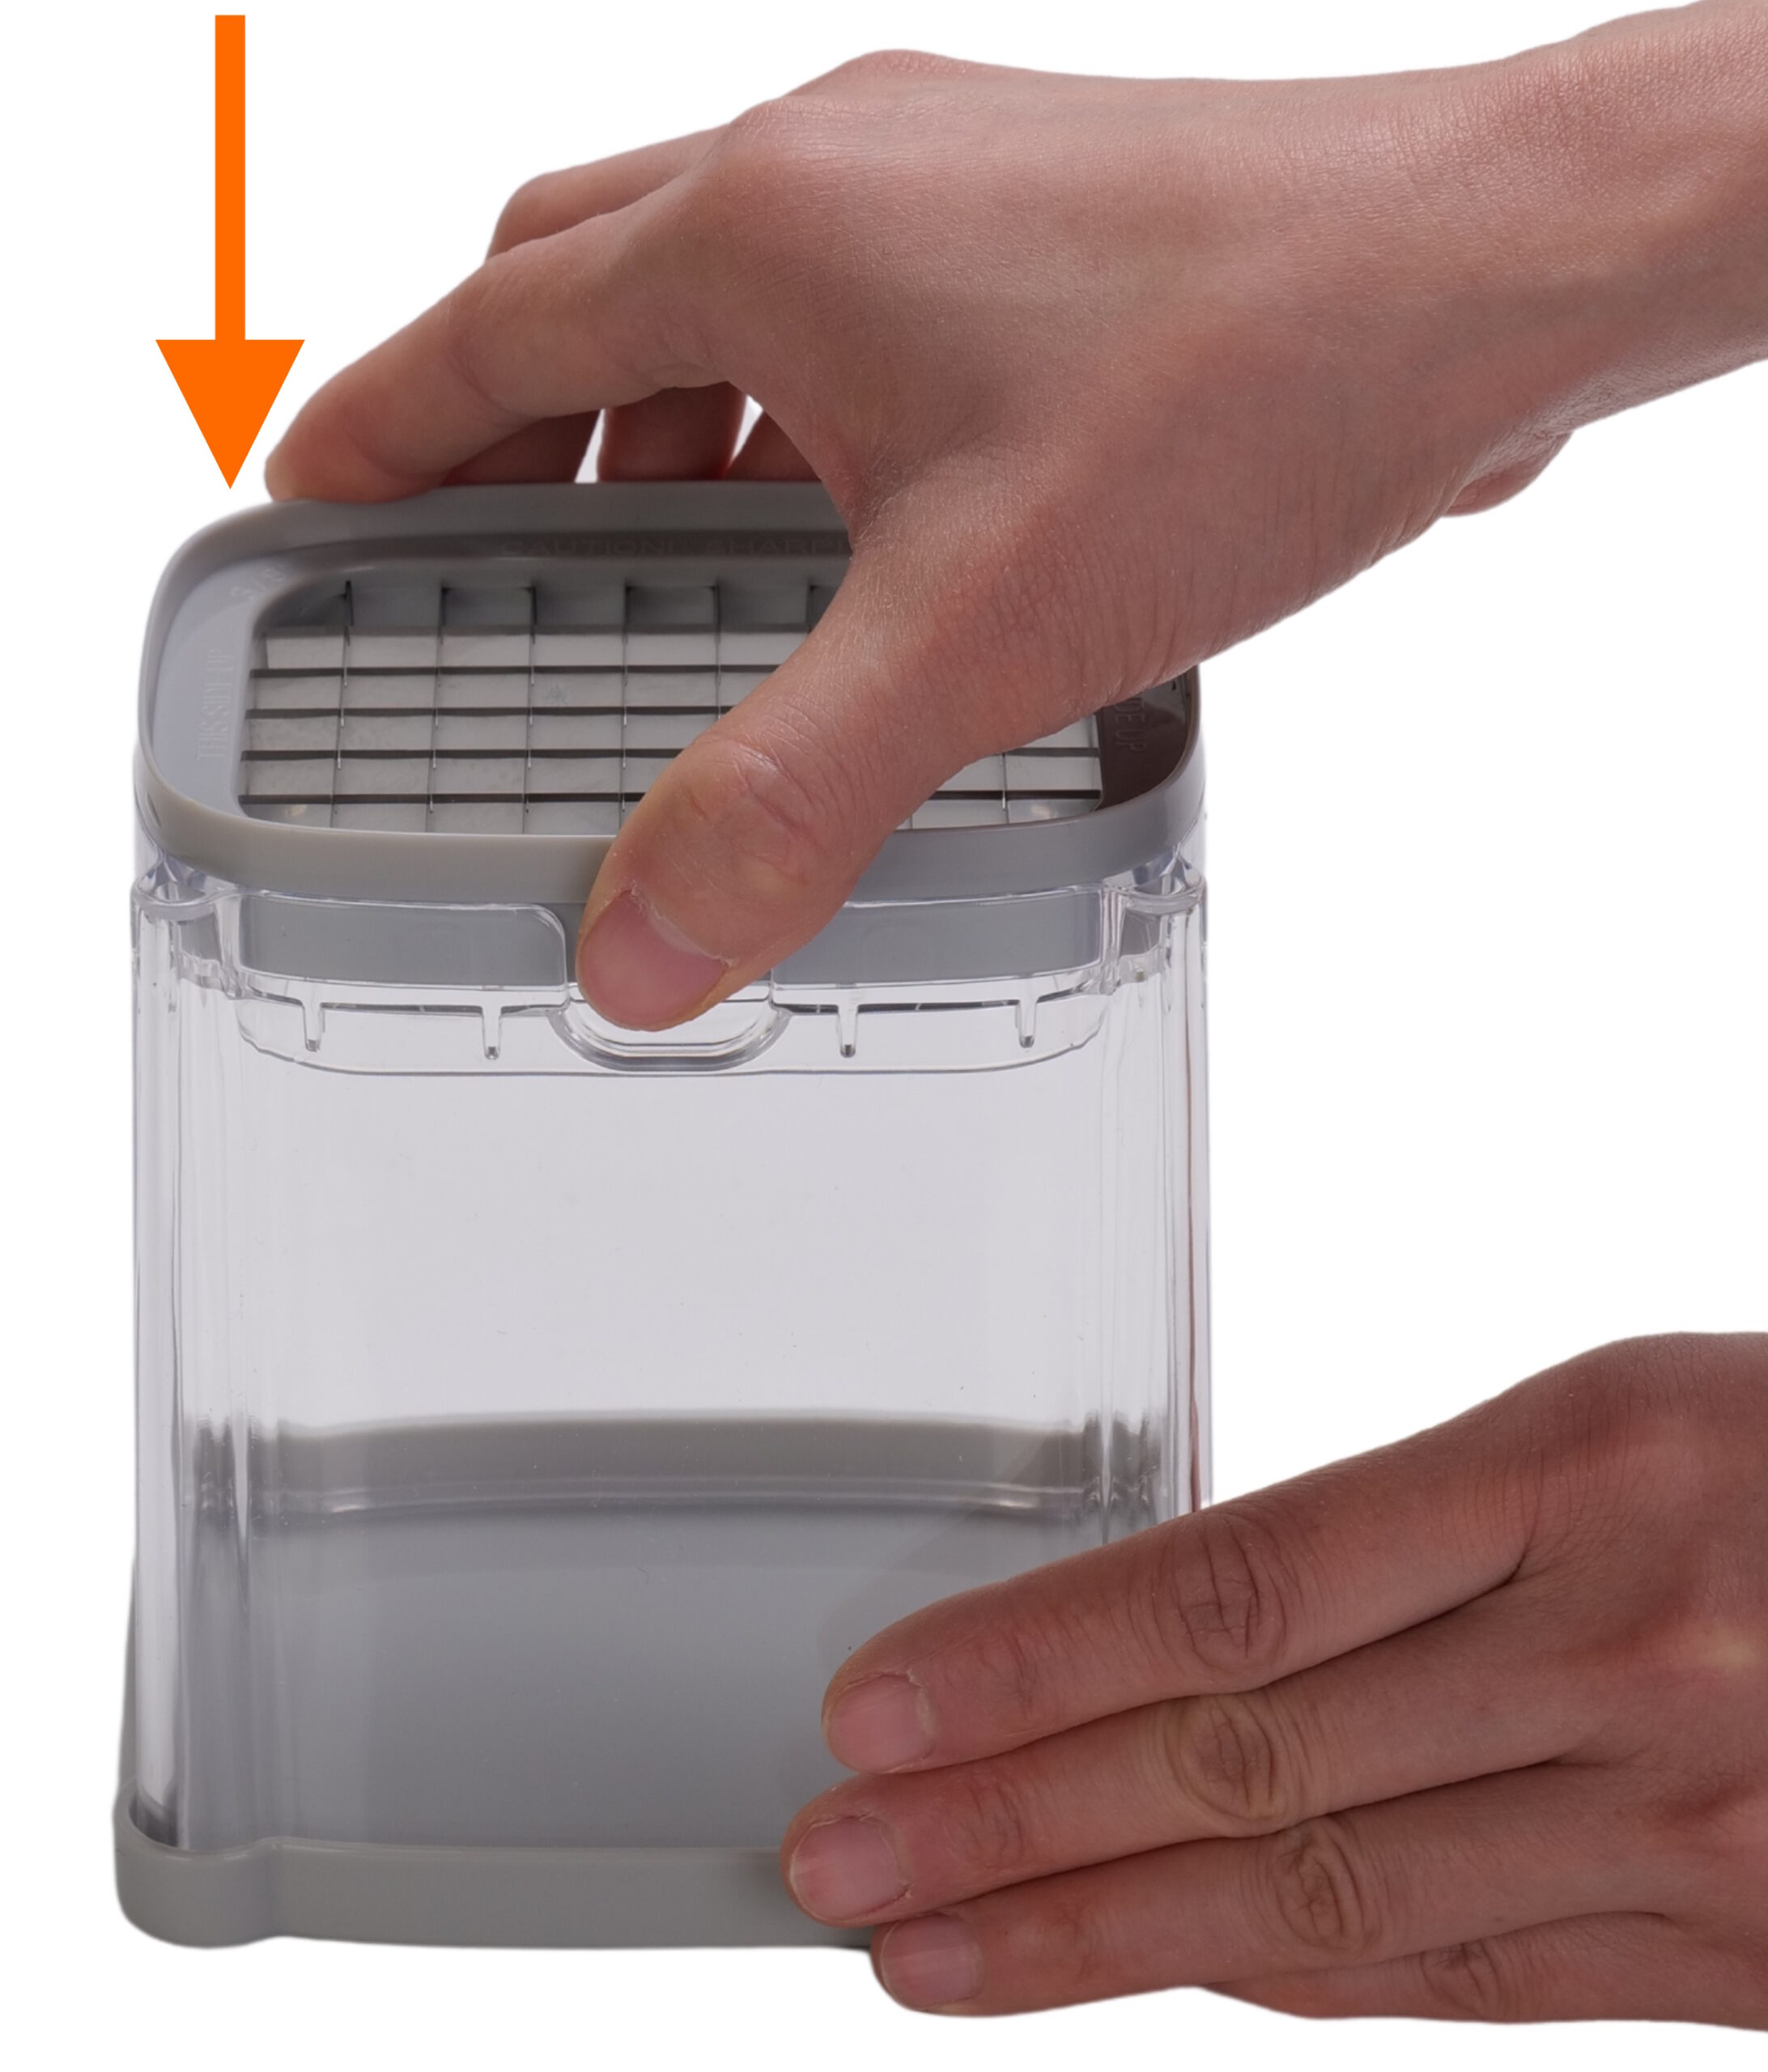
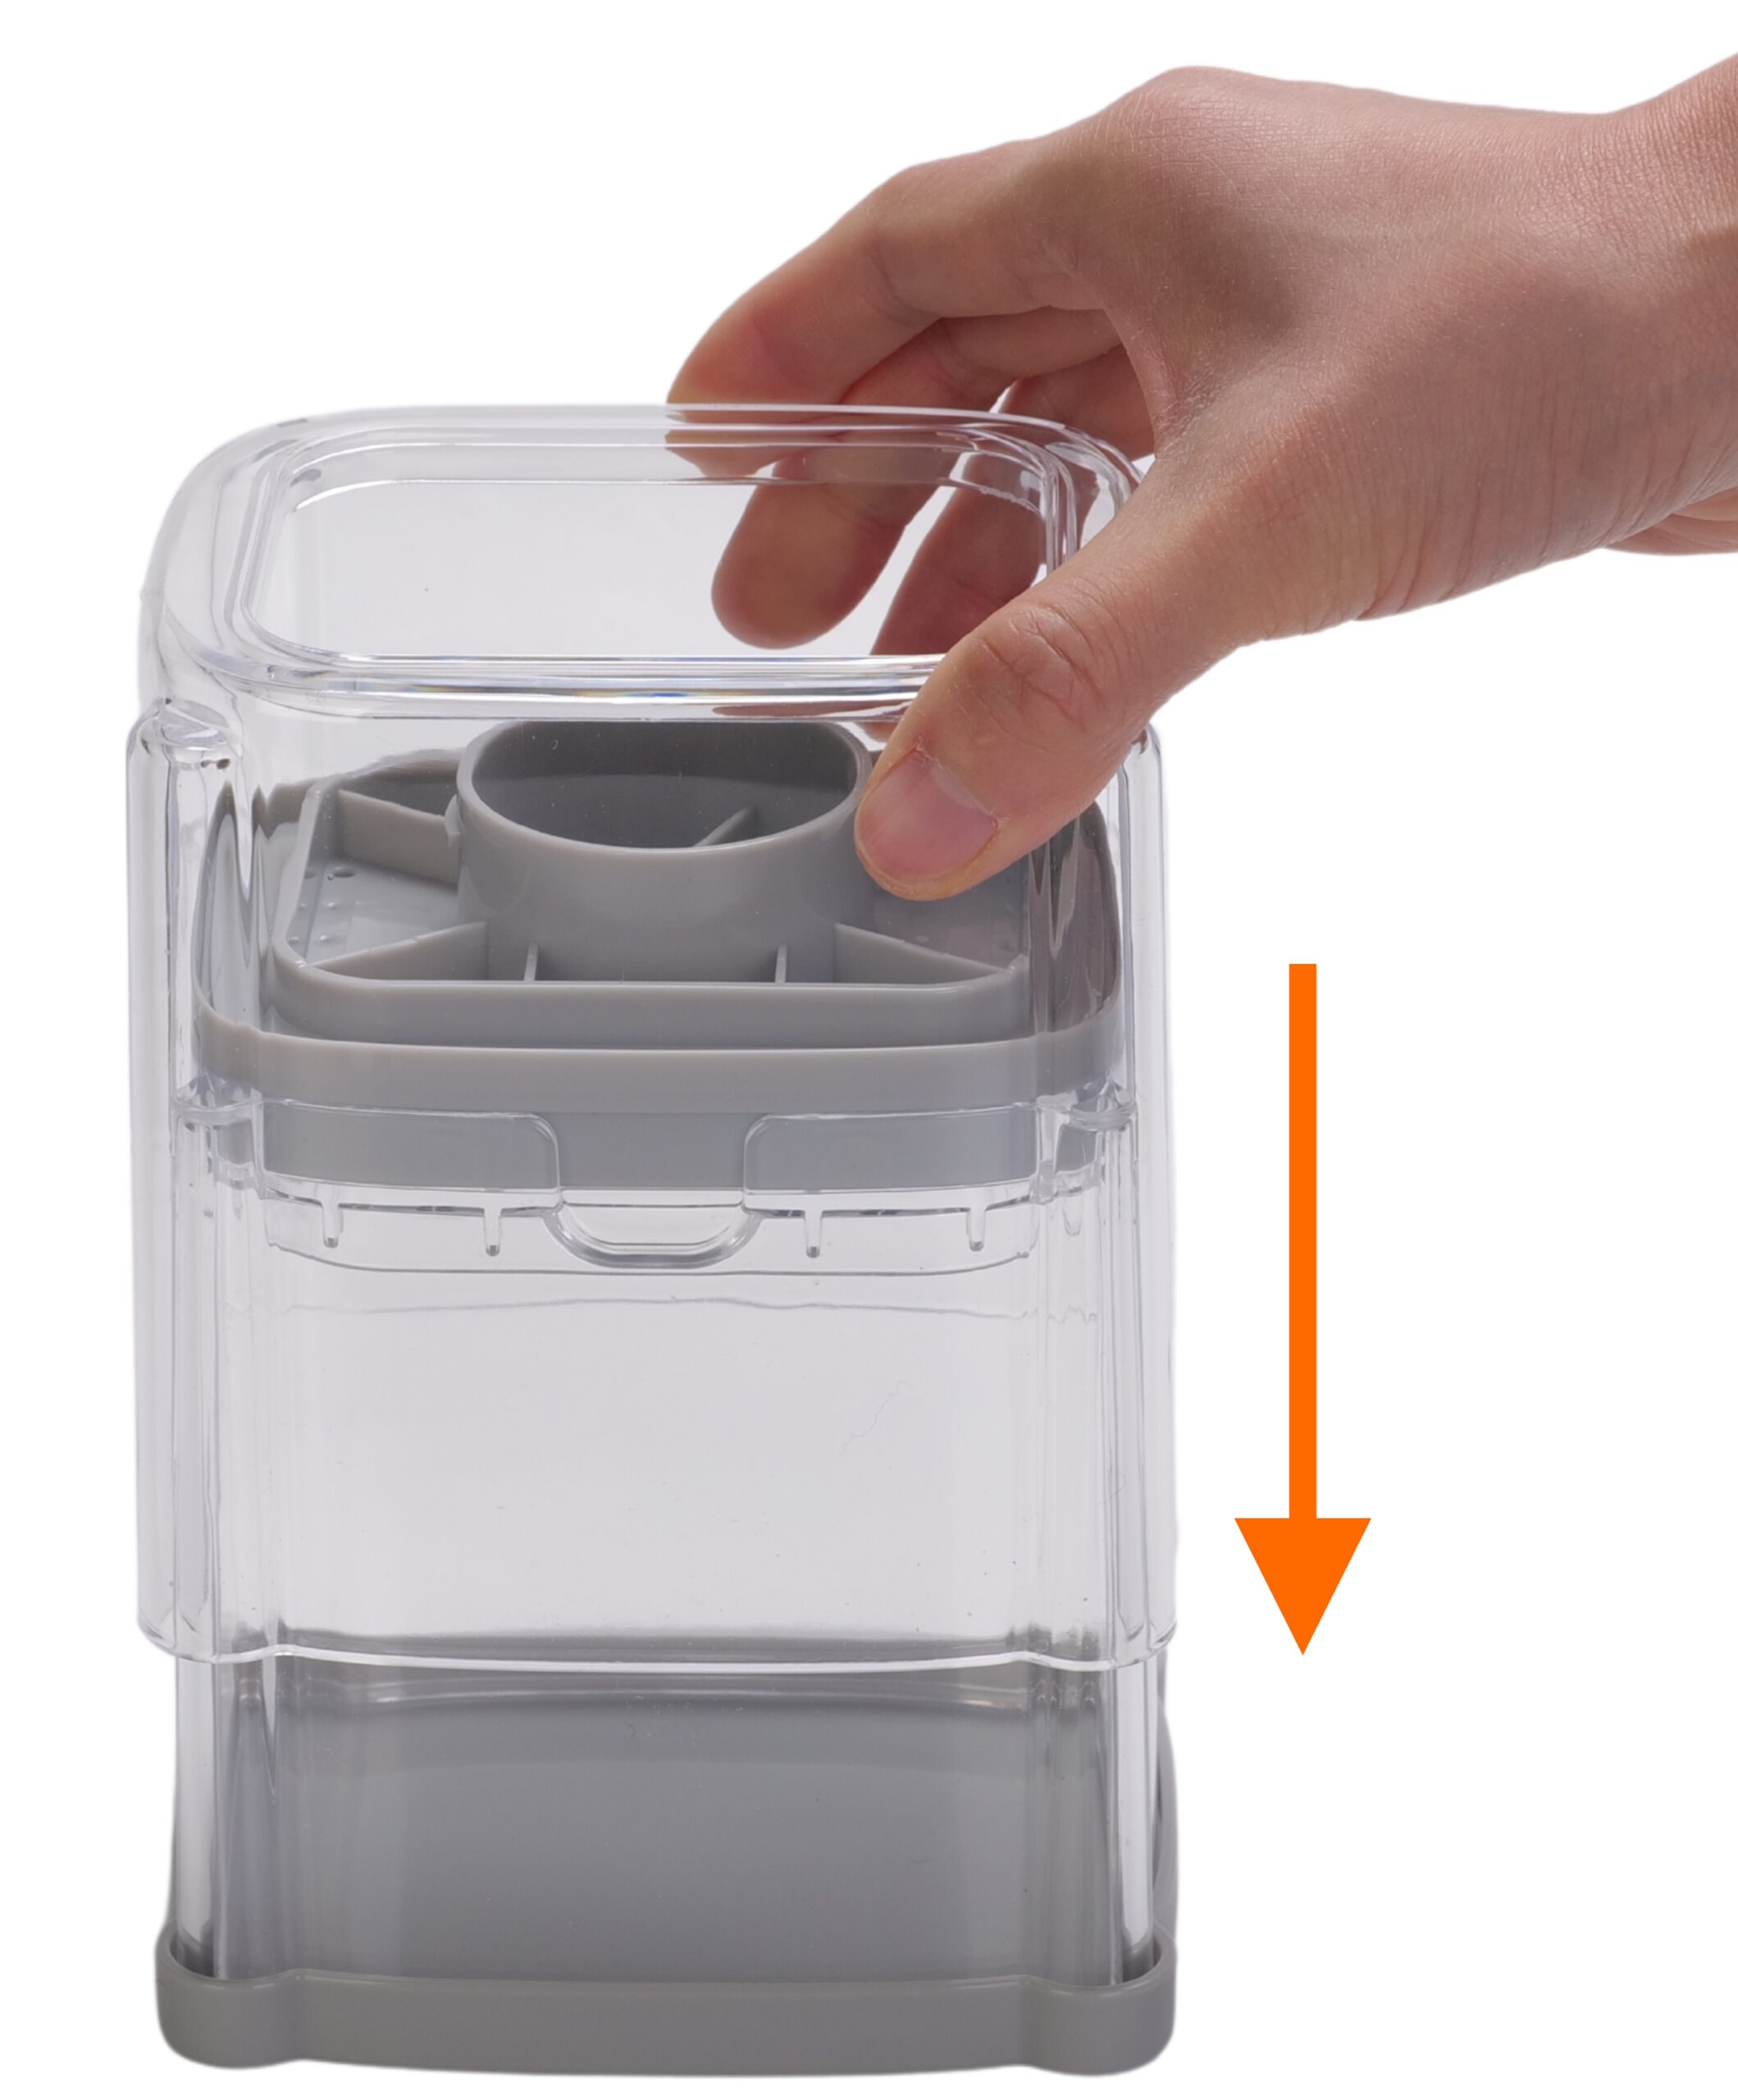
Put the outer body on top of the vegetable, then press down on it with both hands. The faster you press, the less effort it will take.
To make dice from your vegetable, first cut it into slices, then chop the slices one by one.
If the vegetable is harder (e.g. beets, sweet potatoes) cutting it first into slices will make the chopping easier. You can also microwave it for 30 – 60 seconds to soften the vegetable beforehand.
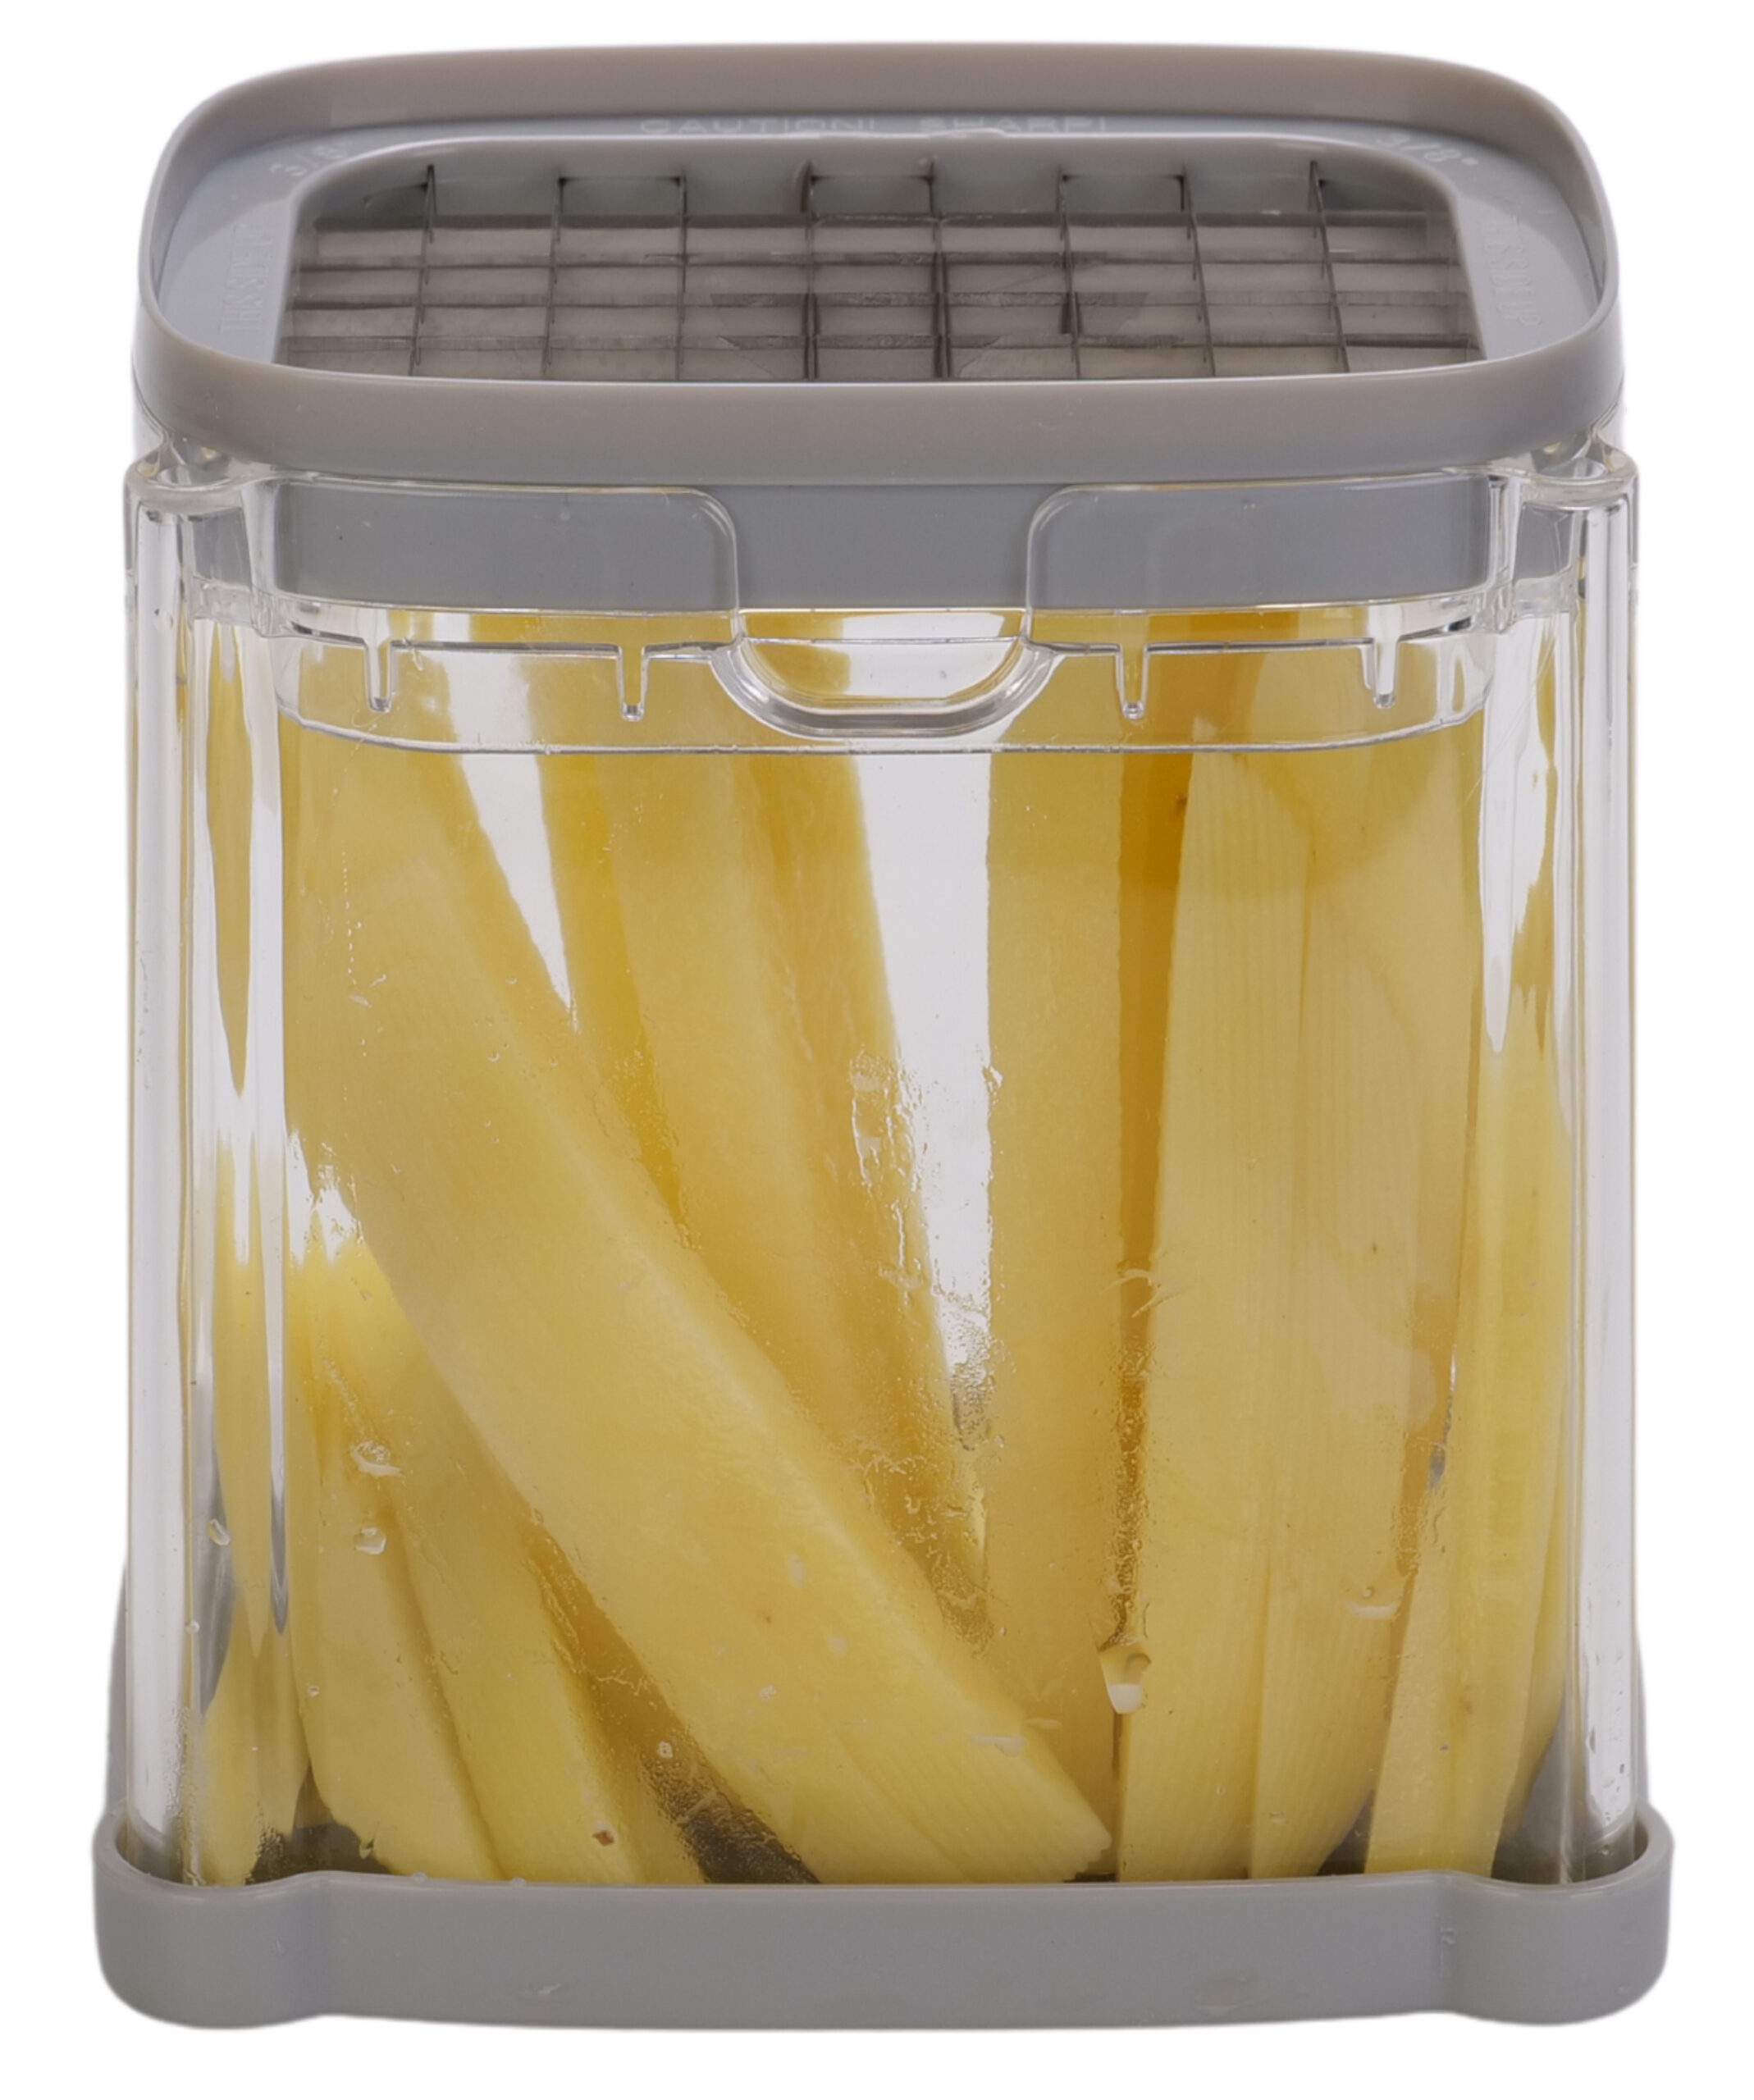
- Detach the tray at the bottom to get your freshly cut vegetables.
Types of Produce to Use
- Use straight, firm vegetables.
- If the vegetable is too long, cut it into pieces of no more than 4 inches (10 CM) in height.
- If the vegetable is curved, cut it into straight pieces first.
- NOT for sticky or sinewy produce.
- NOT for over ripe or mushy produce.
What Blades to Use
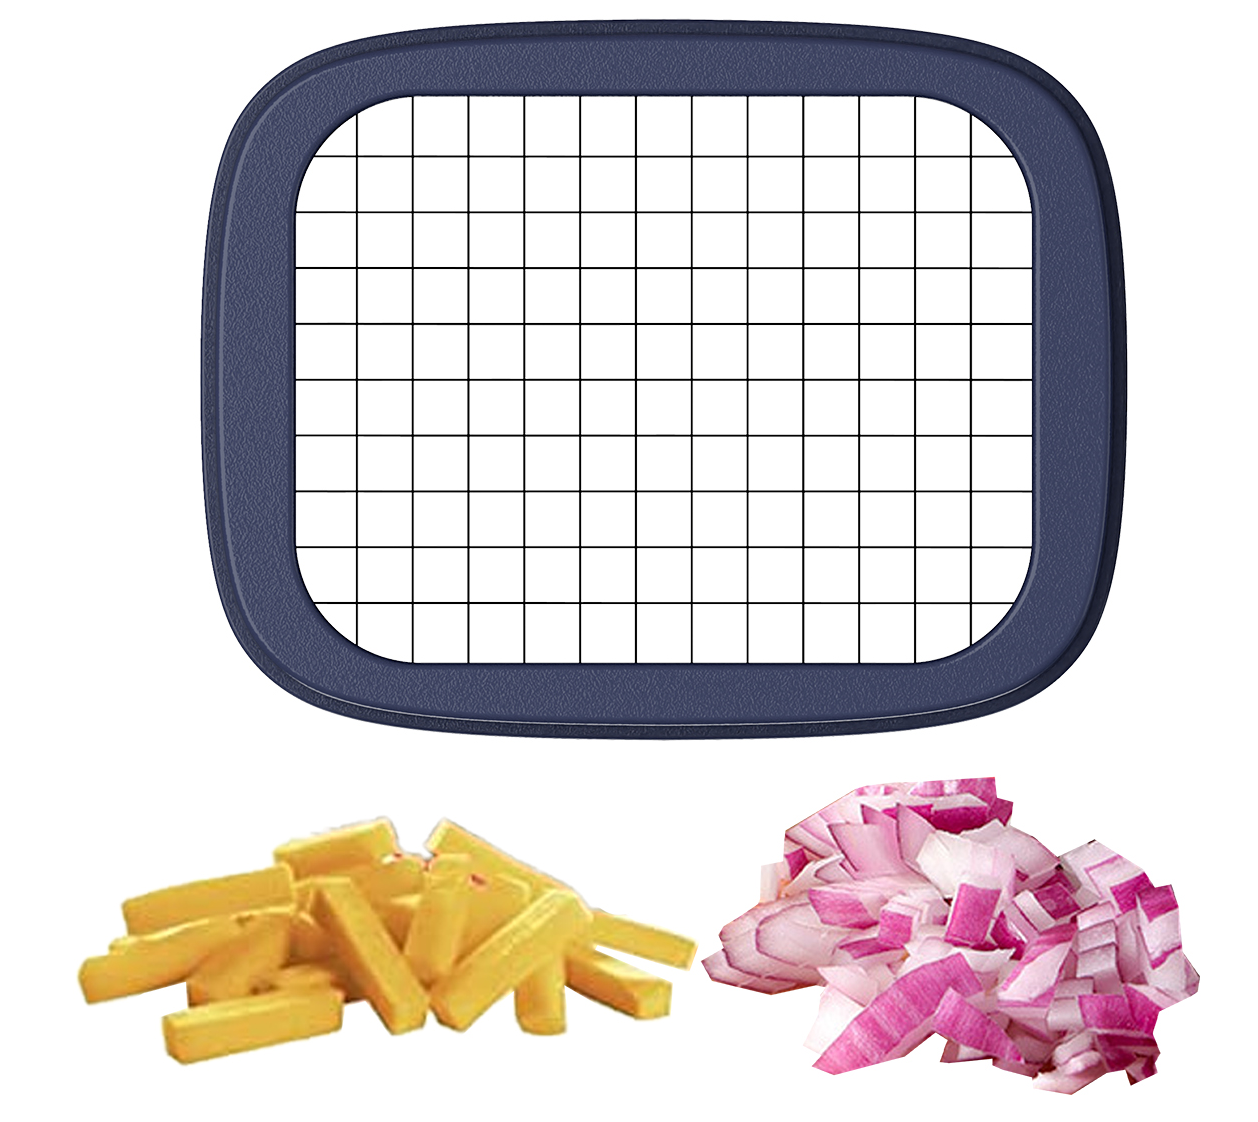
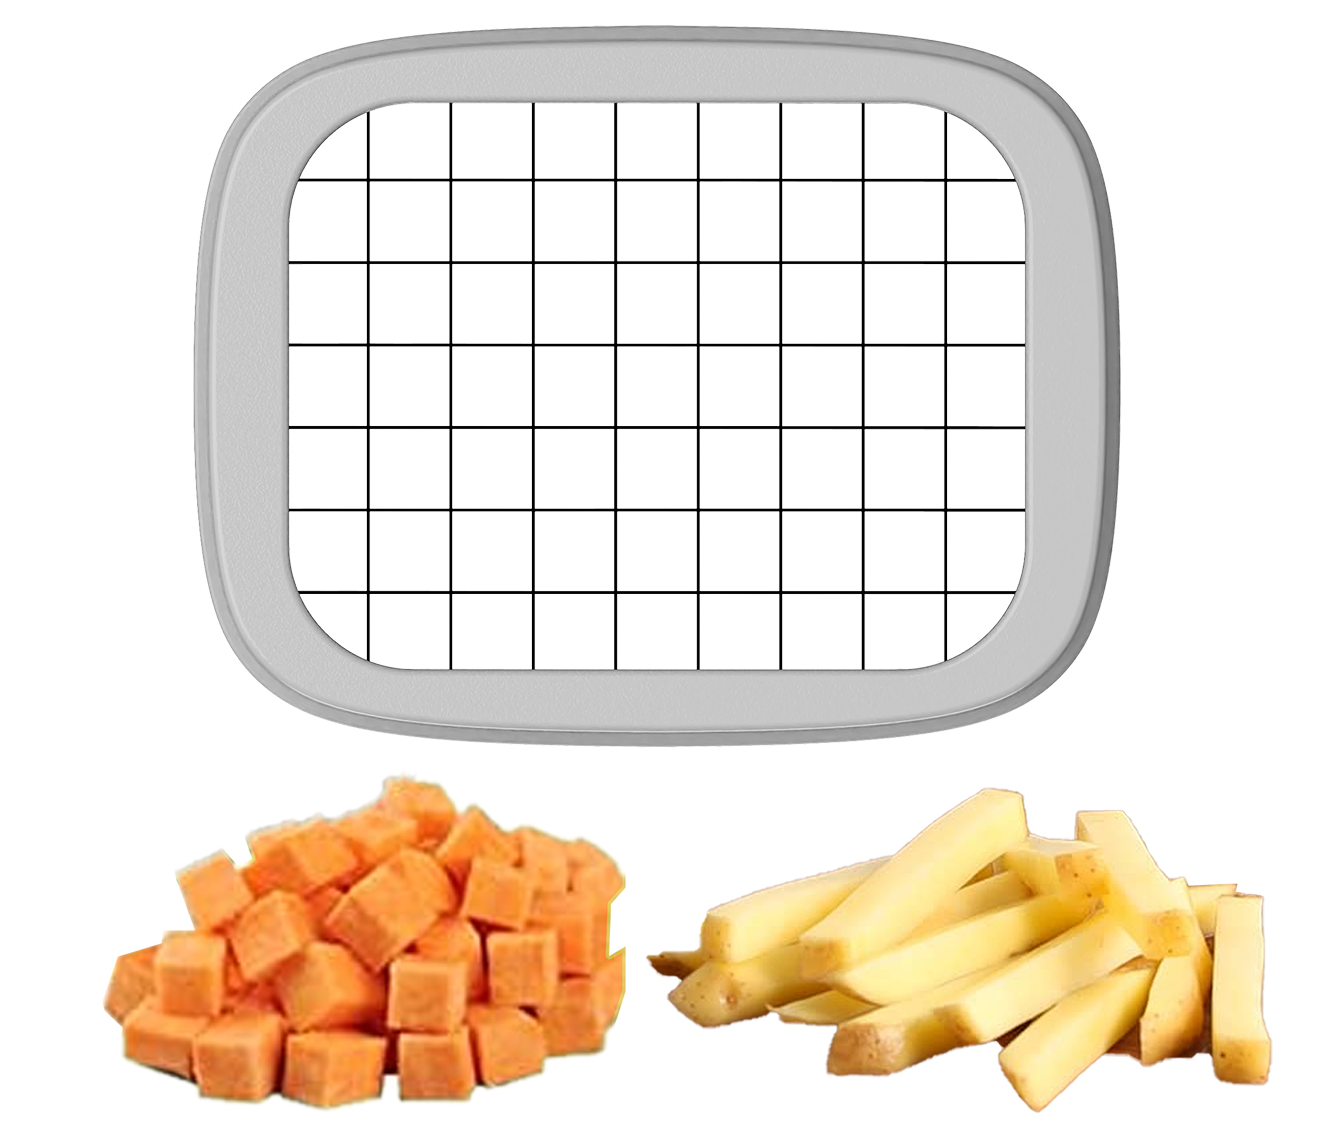
Use the 2 square blades (1/4″ and 3/8″) to make vegetable dice or sticks from: Potato, cucumber, zucchini, carrot, onion, mushroom, ham
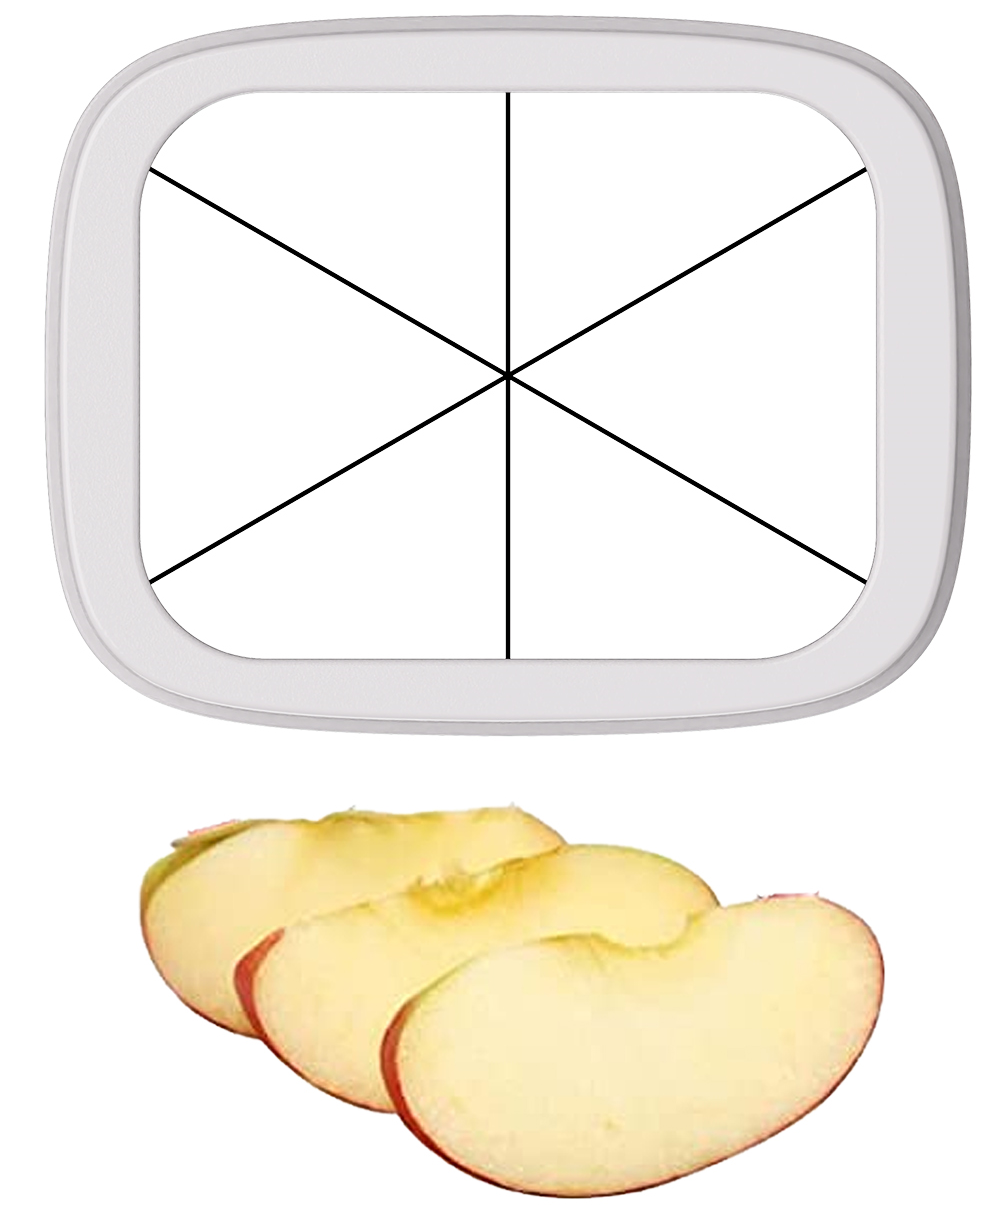
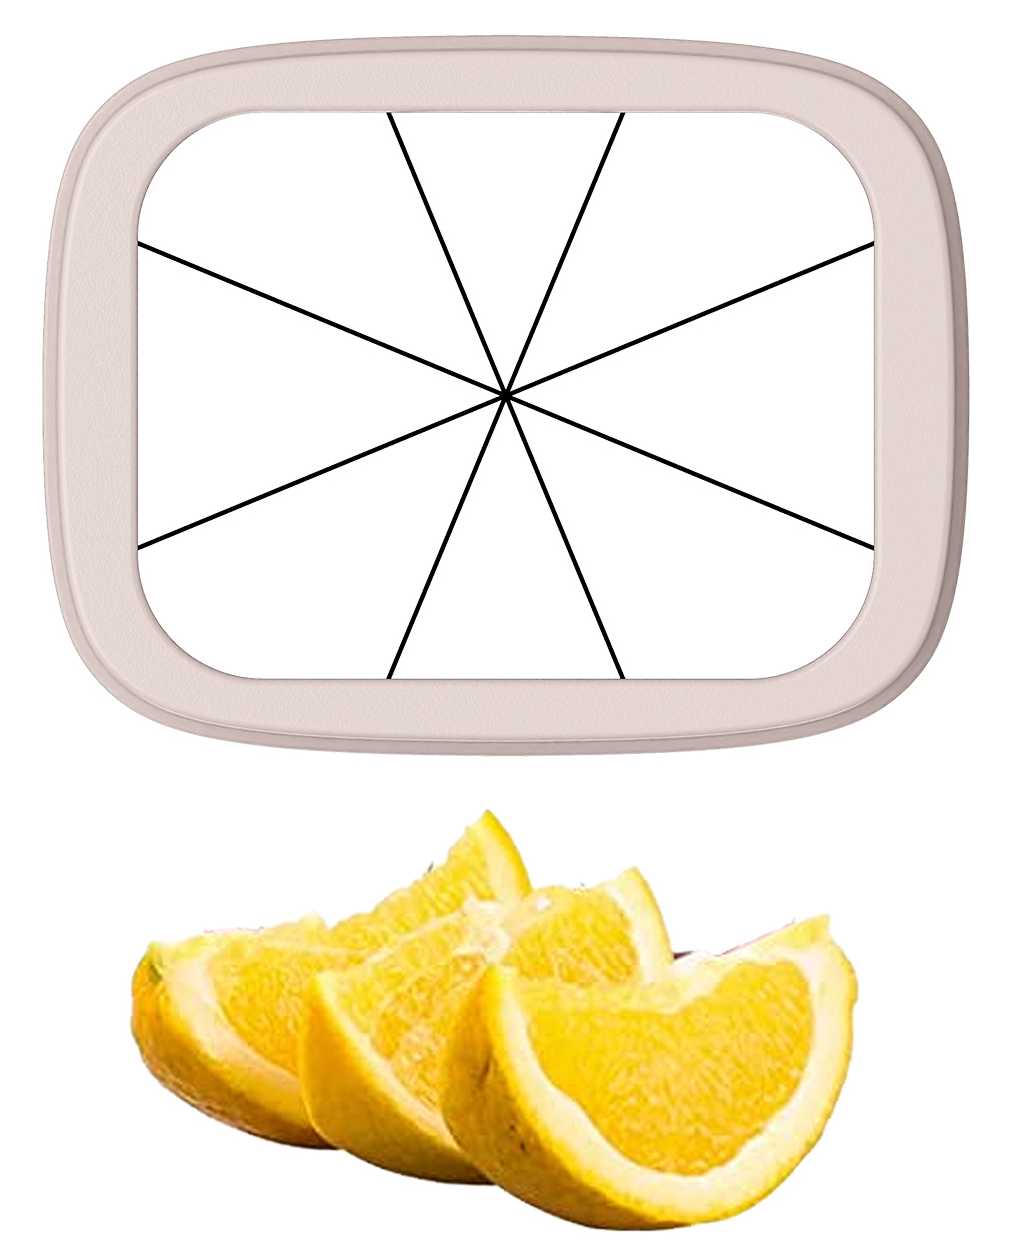
Use the wedge blades (6-wedge and 8-wedge) to make wedges from: Potato, orange, tomato, lemon, apple, kiwi, mushroom
How to Change Blades and Pushers
- Insert the desired blade into the top of the inner body, so that it sits flush. Make sure the side marked with “THIS SIDE UP” faces upwards.
- Insert the corresponding pusher onto the blade insert. Make sure the pusher has the same color as the installed blade. Using an incorrect pusher (i.e. a pusher with a different color) for your blade insert might result in damages to your blade.
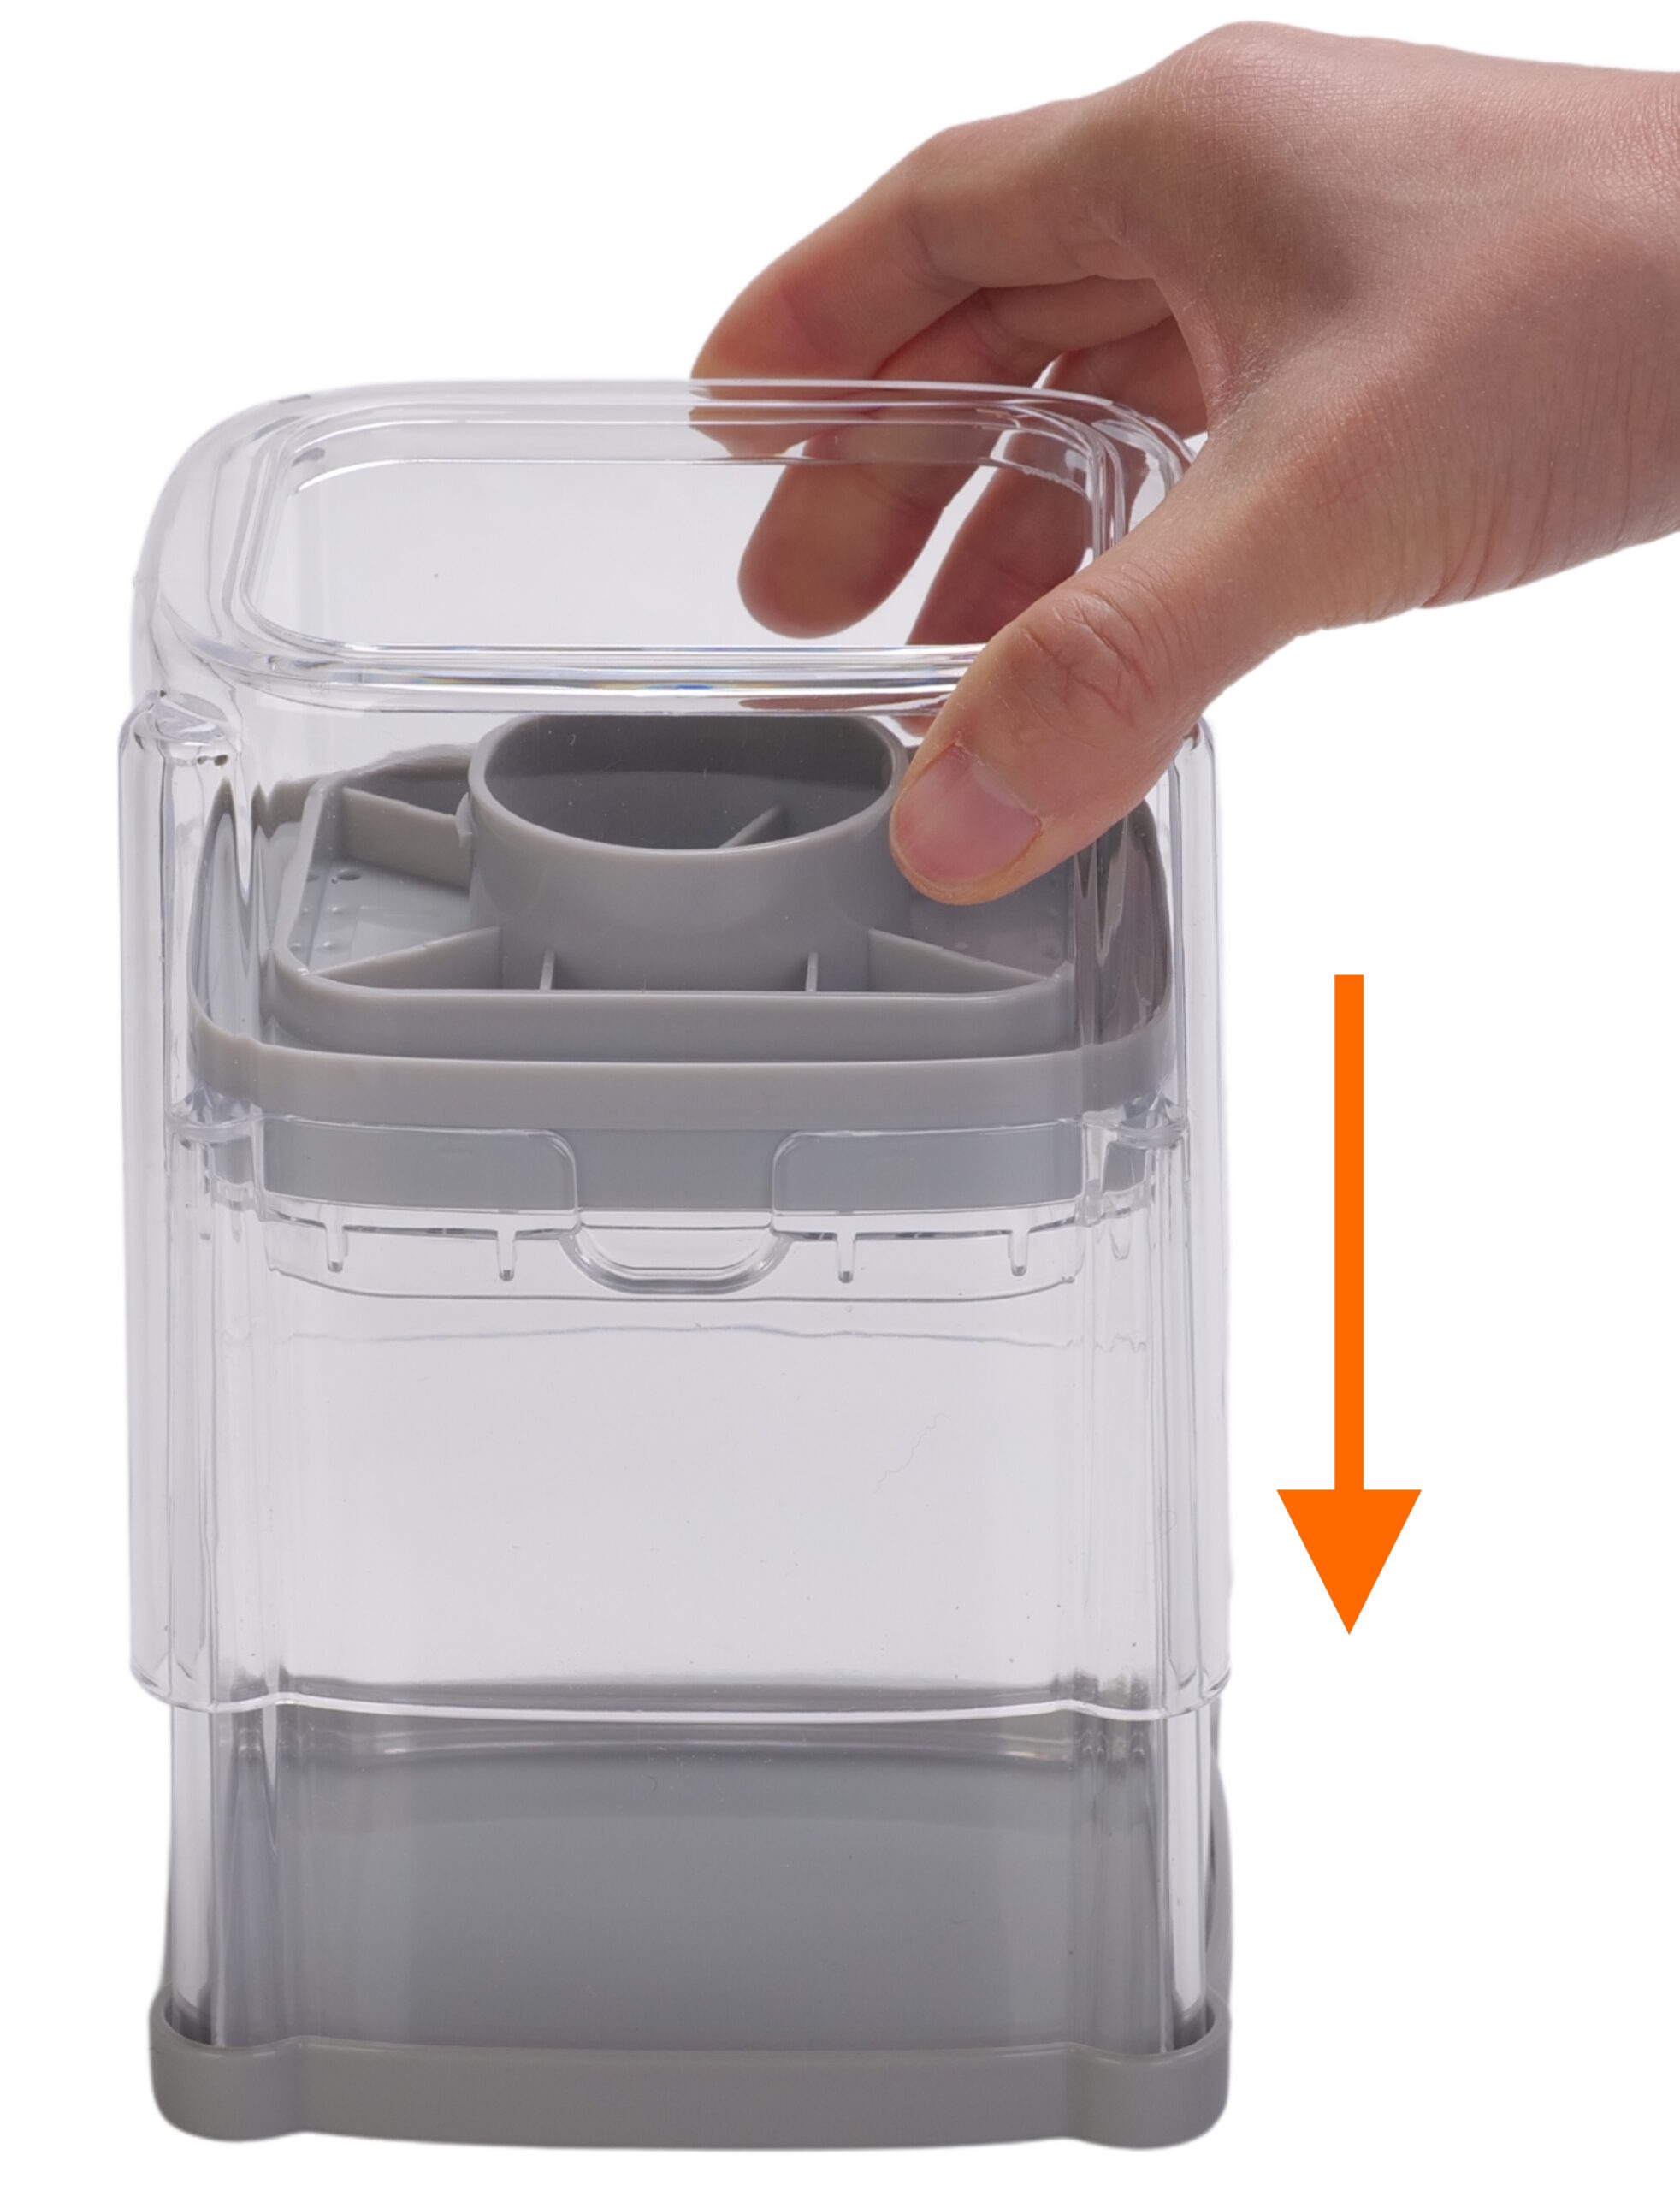
- Put the outer body onto the pusher.
- Put the press plate on top, then turn it clockwise so that it locks into the pusher.
How to Remove a Previously Installed Blade Insert and Pusher
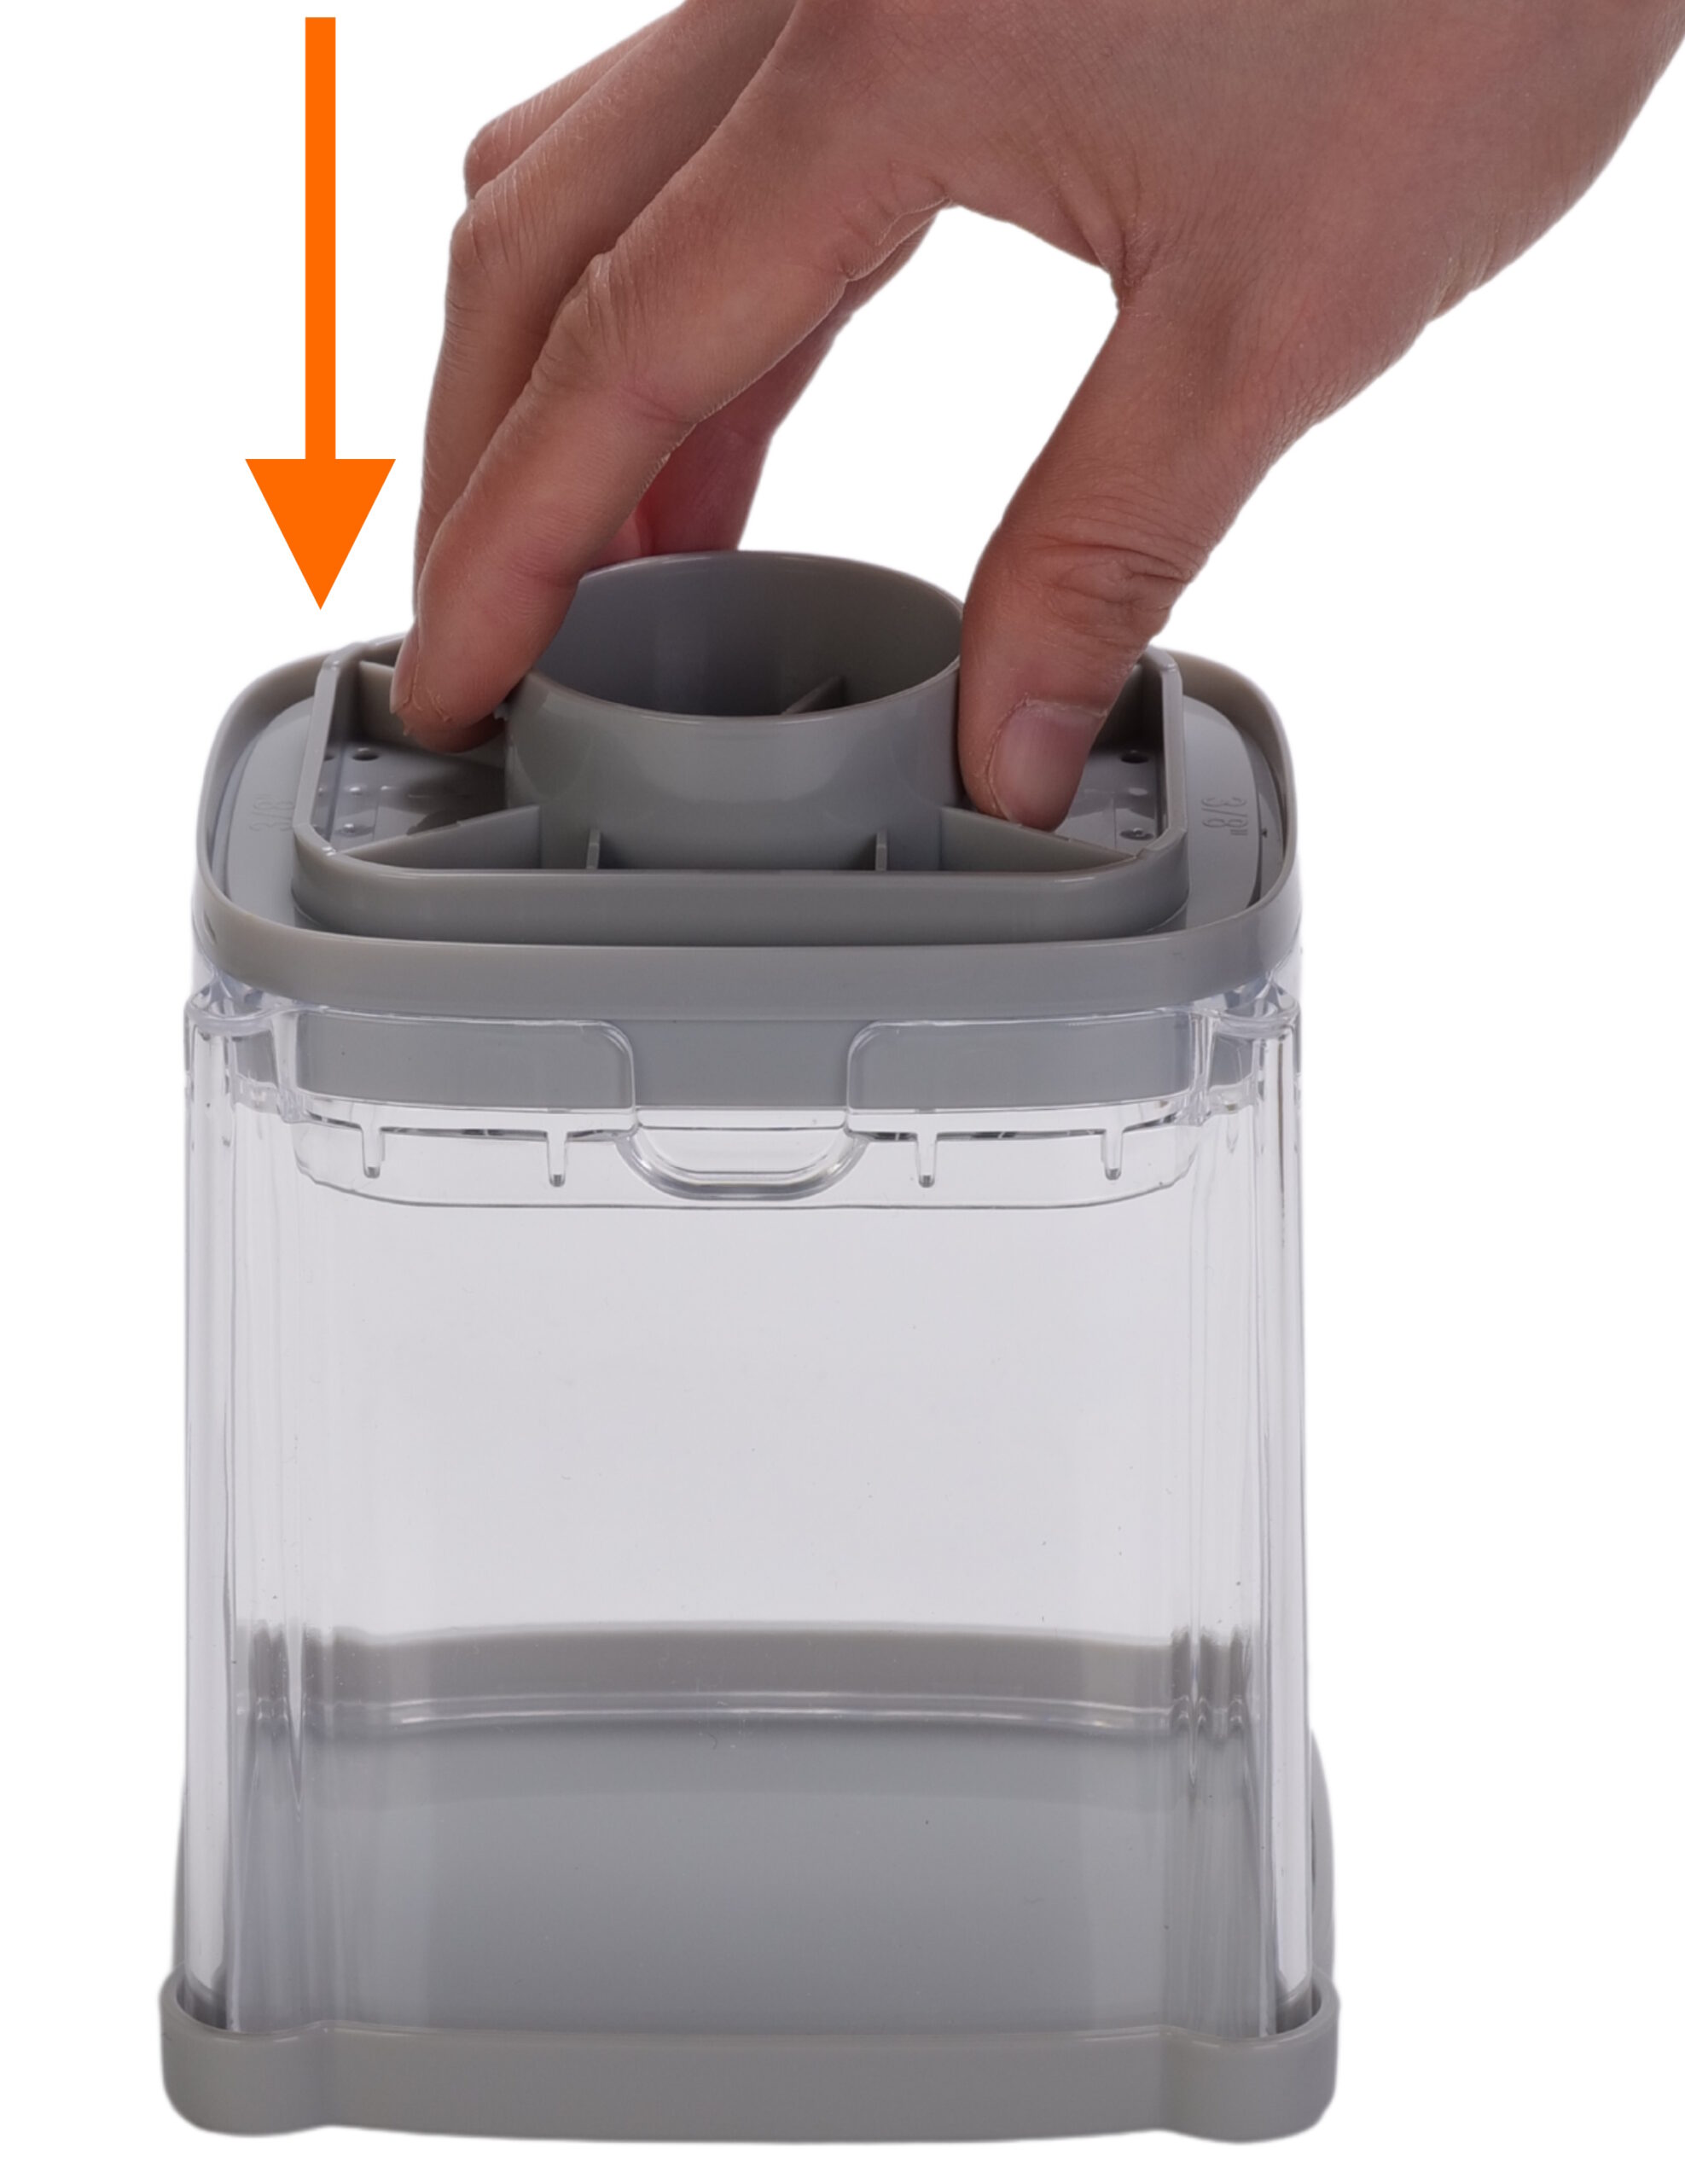
- To remove a blade insert previously installed on the inner body, hold the blade insert at the 2 indents, and lift it up.
- To remove a pusher previously installed on the outer body, turn the press plate counter-clockwise to detach it from the pusher, then push the pusher down to release it.

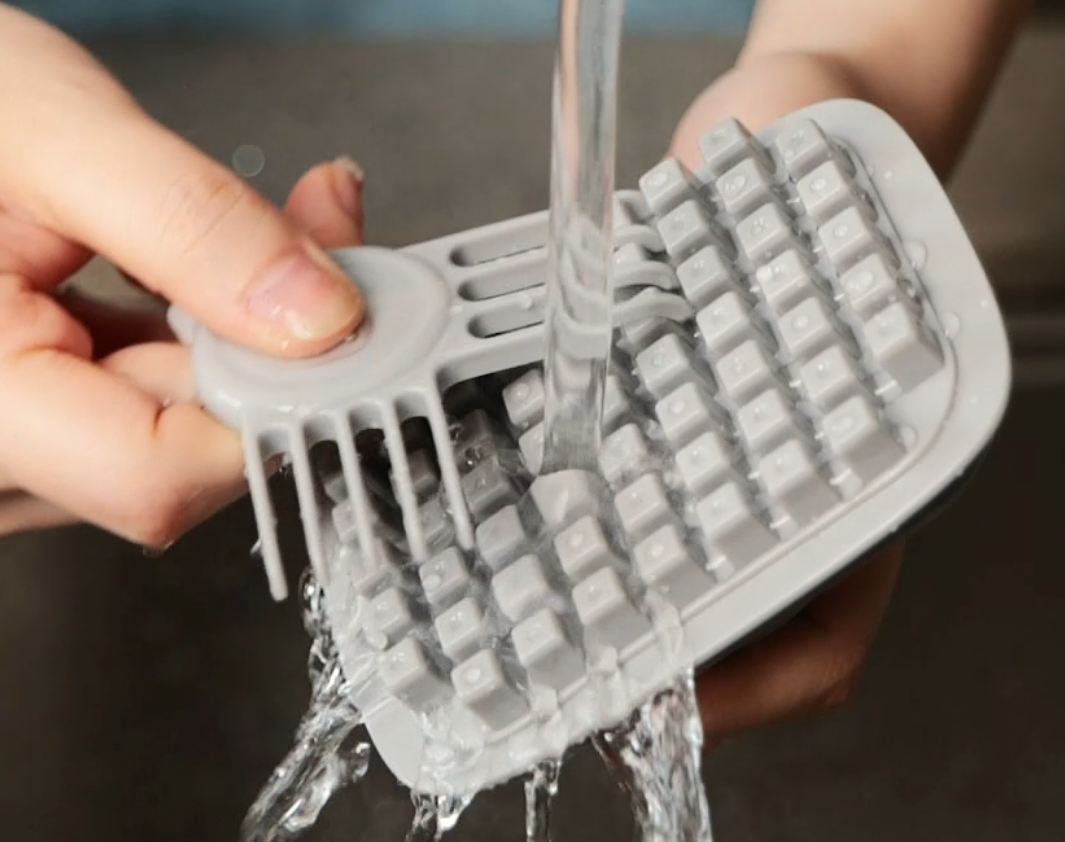
How to Clean the Chopper
- It’s best to clean the chopper immediately after use.
- Use the provided cleaning comb to clean between the spikes of the pushers, or between the blades of the blade inserts.
- Disassemble the parts for easier cleaning.
- Wash the inner body and outer body by hand. Do not put them into the dishwasher, as high temperatures in the dishwasher might cause them to warp.
- All other parts are dishwasher safe (top rack only) up to 65°C (150°F).
- Make sure all parts are clean and dry before storing the product in a dry area to avoid steel oxidation which can develop rusts on the blades.
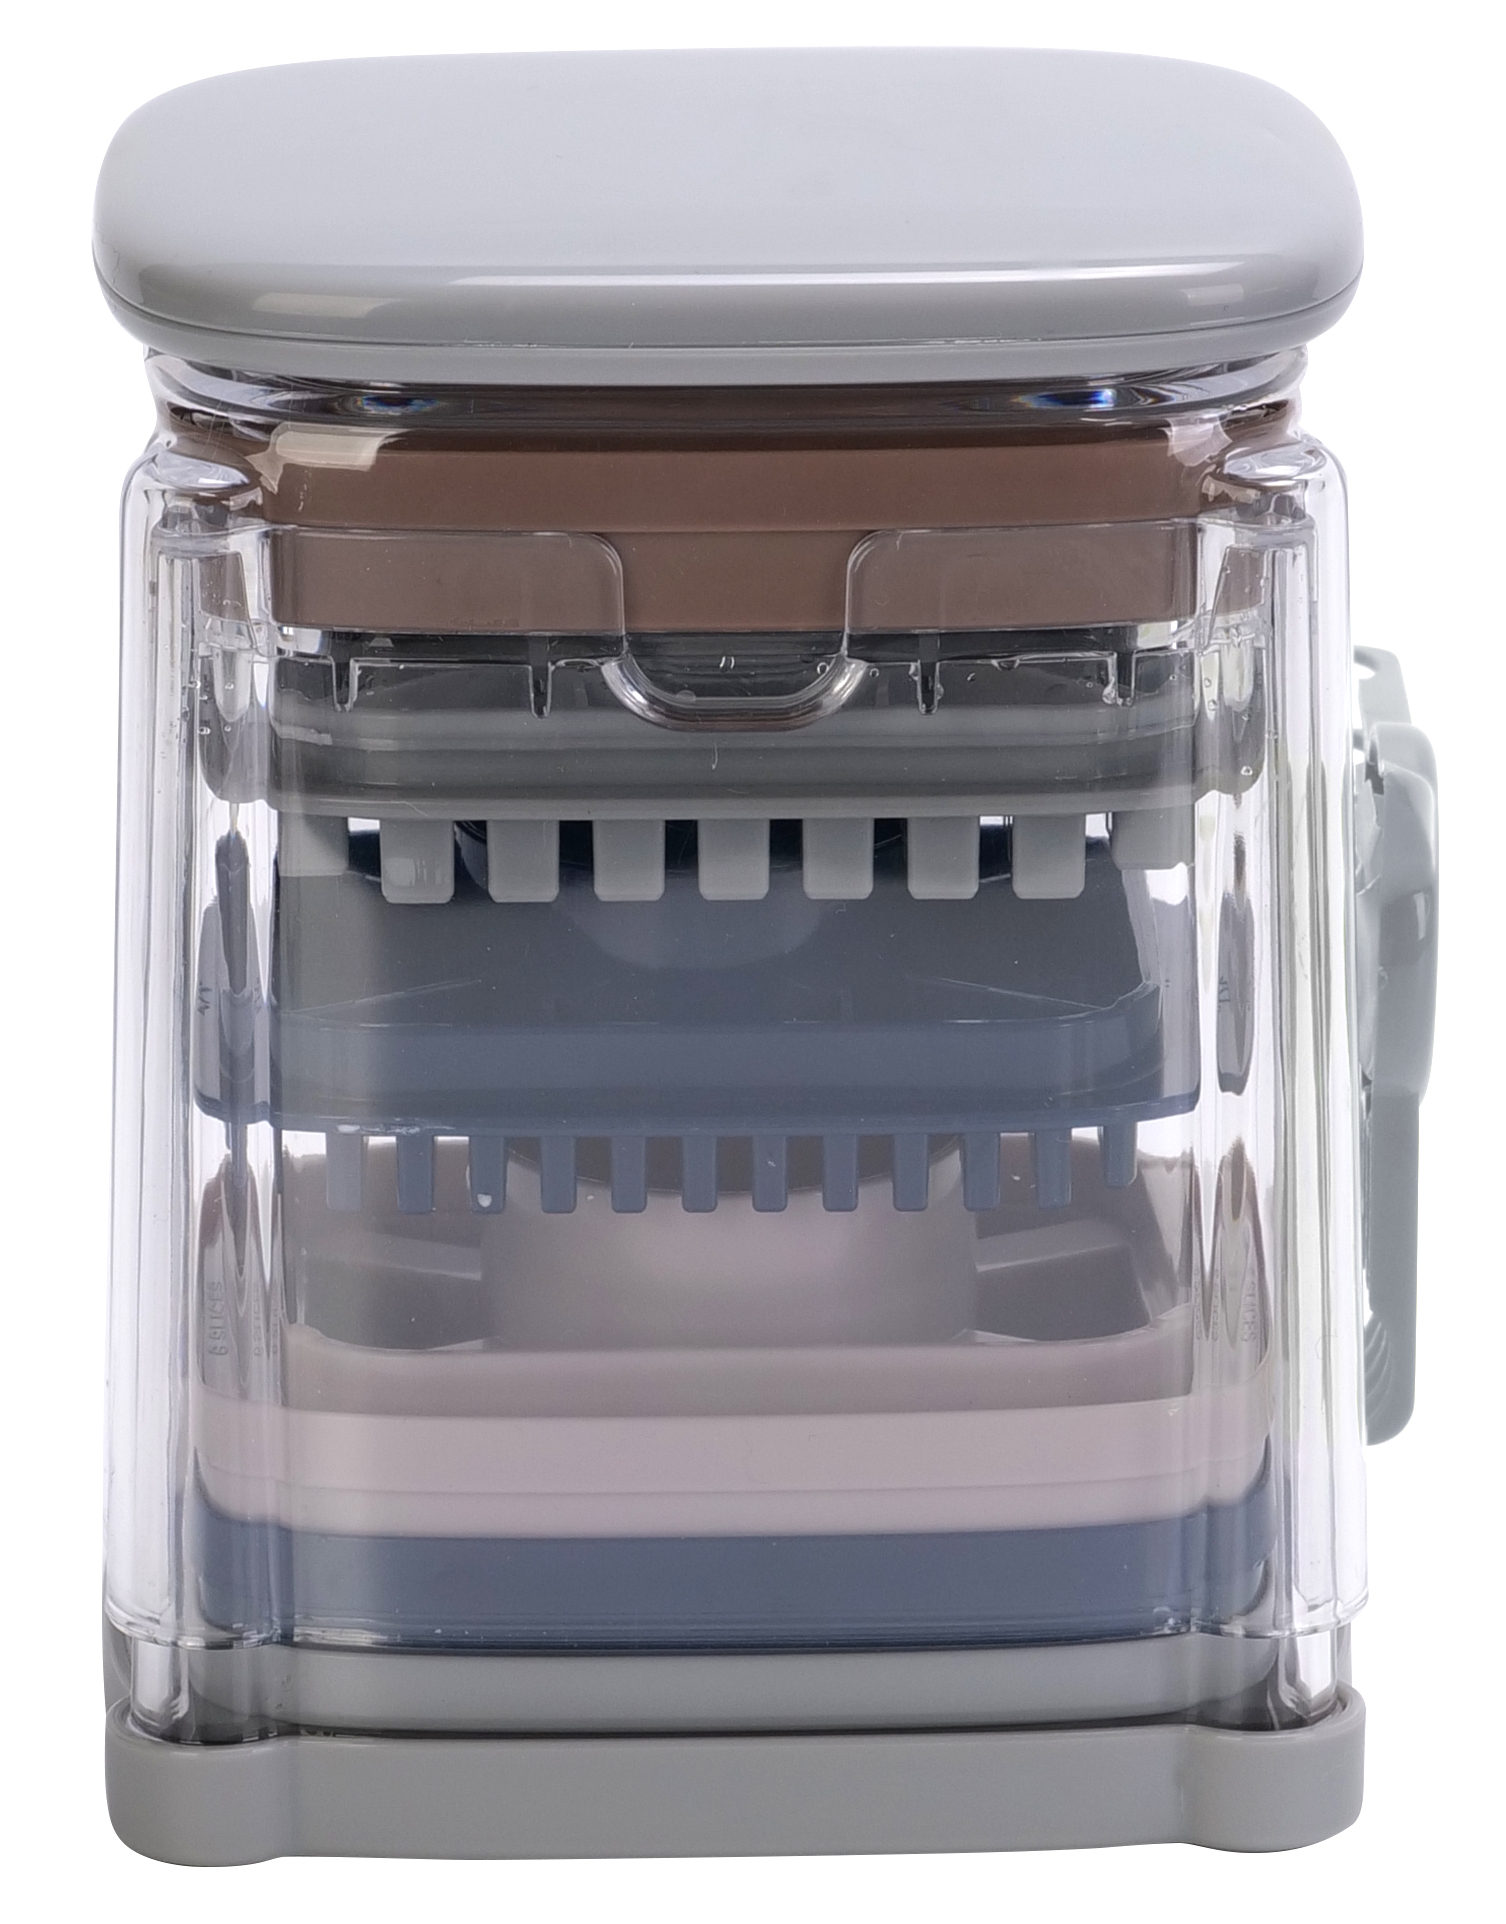
How to Store
To store the whole product neatly, arrange the components in this order from the top down:
- Press plate
- A pusher attached to the press plate
- The corresponding blade insert for the pusher, installed in the ready to use position
- The remaining 3 pushers
- The corresponding blade for the pusher at the bottom
- The remaining 2 blades
- Tray
Bonus Recipes
Want an easy way to prepare healthy, tasty salad or salsa dishes with your Brieftons PerfectCut Food Chopper? Download your exclusive Brieftons Recipe Ebook bonuses now from:
https://www.brieftons.com/chopper-recipes
Happy chopping!